Average Time Until Event With Calculated Metrics
Google Analytics can answer many questions, but every client’s needs are different. Many clients ask questions that can’t always be immediately found in their data. Recently I was asked, “How long has a user been on this page before completing a specific action?” We set up event tracking to know how many times that action was completed, but wanted some additional metrics to gain that extra bit of insight.
As an example, imagine there is a ‘request information’ form on your site. This form is found on several different pages throughout the site. You want to know how long a user is spending on a page before they finally request information. This will help the client better understand when a user interacts with the form and how different pages affect that.
How?
My colleague, Amanda, wrote a great post on underused features in Google Analytics. I recommend taking a look to give you ideas about how to answer questions you don’t think are possible to answer. Get those creative juices flowing and dig deeper than the basic reports!
Sometimes, you may not be able to answer your question with the default data pulled into GA. Two features Amanda mentioned are custom and calculated metrics. We are going to use this to answer my client’s question.
What Are Those?
First, what are custom and calculated metrics? Custom metrics allow you to pull in data from outside sources into GA. This may include quantity or number of results. Read Google’s documentation for a more in-depth understanding. To answer this question, you will need to create at least two custom metrics.
Create Custom Metrics In Google Analytics
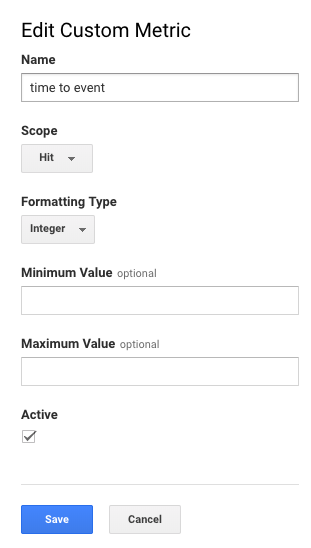
To create a new custom metric in Google Analytics, go to the admin panel under the property section, click ‘custom definitions’ and then click ‘custom metrics.’ Click to create a ‘new custom metric.’ Give the first custom metric a name like ‘time to event.’


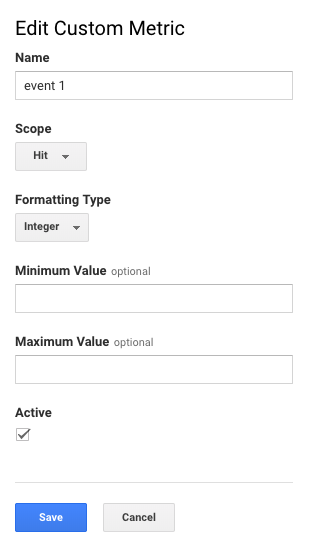
Create a second custom metric and give it the name of the event for which you want to calculate the average. Since we can’t filter for the total of one event with calculated metrics, we need a metric that tallies up the total number of times the specific event happened.
After you save the custom metric, remember the index number associated with it.
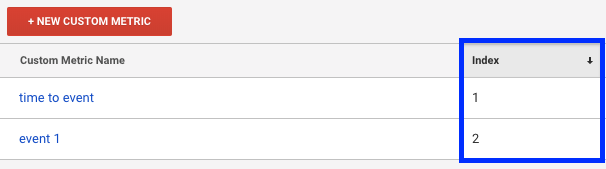
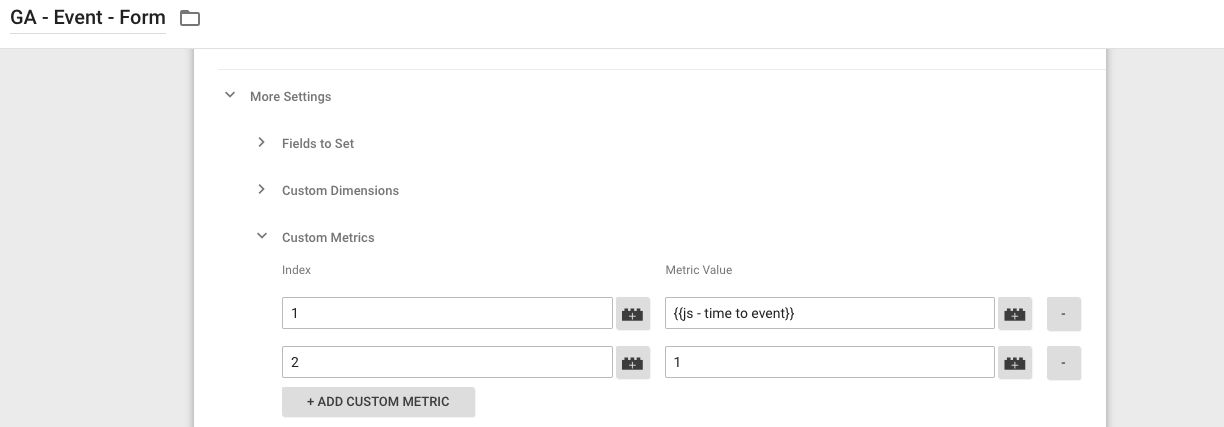
We will use these numbers to reference in Google Tag Manager so we can send the appropriate data to Google Analytics.
Tell Google Analytics the Values for Those Custom Metrics
We’ll use Google Tag Manager to help set this up. There are two user-defined variables that you will need to create to calculate the time to event. First, you need to grab the time the page loads.
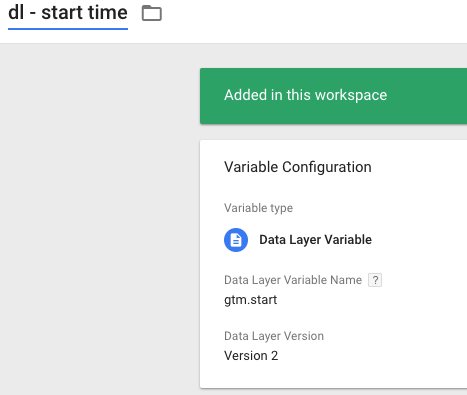
In GTM, create a variable that captures the timestamp when the page loads. To do this, create a new dataLayer variable. Name it something like ‘dl – start time.’
In this box, we can use the already defined dataLayer value that tells us when GTM started, which is called gtm.start.
This gives the time in milliseconds since January 1, 1970. This part seems a little odd, but it’s easy for us to manipulate. Google Tag Manager automatically records this when it loads on the page, we’re just going to steal it and use it for our purposes.
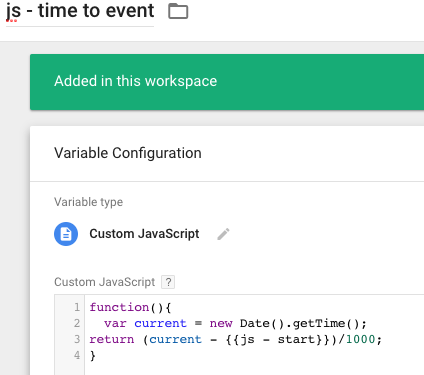
Now we need to get the time the event happens and subtract it from gtm.start. This will be the value of our first custom metric. Copy the script below and place it in a new custom javascript variable called something like ‘js – time to event.’
function(){
  var current = new Date().getTime();
return (current - {{dl - start time}})/1000;
}
For our second custom metric, put a ‘1’ in the value field. That will simply increment by one each time that specific event happens, giving you the total number of times that event was completed. Keep in mind, this entire method works best for events that only happen once on a specific page – like filling out a form.
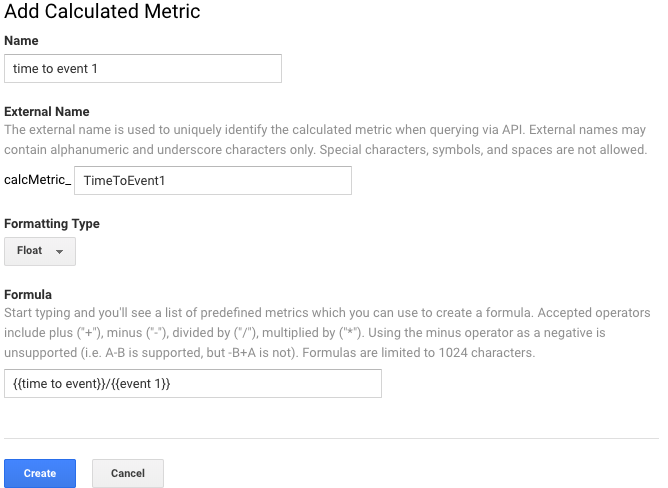
Create a Calculated Metric in Google Analytics
You can find this feature in the admin panel under the view section, click ‘calculated metrics.’ Create a name and for the formula, enter {{time to event}}/{{event 1}}. This calculated metric now gives you the average time before the event occurs.
Where Can I See This Data?
Now that you have this data, you may ask yourself, ‘now where can I even see this?’ You can create a custom report within Google Analytics or access this metric in Data Studio. Both will provide you with better insight into how long a user is on a page before interaction with whatever your site’s important objective might be.
Are clients spending too much time on the page before interacting with a desired call-to-action? Are they not reading enough information on the page? If a user can fill out a request information form across several pages, compare the average among the pages.
Take It a Step Further
Now that you have the total number for a specific event available as a metric, you can do all sorts of calculations. For example, if a user completes multiple steps and each step is tracked as an event, you can calculate the average time between each interaction. This will tell you if users are having trouble with a particular step. You could also calculate drop off for each step. You can really start to get creative here!
Alternative
Don’t forget about the event value field when setting up your events. This could be an option if you aren’t using this field and only want to see the time to event for one specific action. Event value uses an integer rather than a string and also determines the average value.
Conclusion
Hopefully, this post helps add to your current implementation. I also hope it just scratches the surface of all that you will do with custom and calculated metrics. Or even better, maybe you will explore some more of those underused features of GA and discover something new and unique to your needs.