Custom Events Strategy & Tips for Acquia Lift

Every organization's website has particular areas and key user interactions that tie back to their business goals and objectives. Look over these pages and the content to find keywords you can use to personalize the various areas of your website. Say, for instance, you have a robust blog section with frequent visitors. One such campaign you could create with Acquia Lift would be adding a banner at the top of a specific blog post to promote a related action you’d like the user to take, like signing up for your email list or registering for an upcoming event.
Based on the keywords included in the blog post, a banner can be inserted with content relevant to the post. For example, if a user is reading a blog on Acquia the banner content they would see could focus on an upcoming Acquia Lift event. This is a pretty basic use case of contextual user data for a personalization campaign.
But, what if you wanted to personalize based on user behavior? Let’s say you want to target users who have not signed up for your newsletter using a personalized banner with content that is relevant to the type of case study the user has downloaded. Knowing the keywords of a blog post is no longer enough. You need a way to identify when a user has downloaded a case study, which category the case study falls into, and whether or not they have already signed up for your mailing list.
With this in mind, let’s now go through how to set up and create these advanced segments in Acquia Lift.
Things to Consider When Creating Events
As mentioned in our previous post, Acquia Lift events can serve three main purposes—collecting data for reporting, using events as goals, and building behavioral segments. It’s important to identify the purpose of the event before defining it in Lift as the purpose will guide how we set up our custom parameters.
Going back to our example of capturing case study downloads, the event “case_study_download” is general enough to be used in a segment. But what if I wanted to use it as a goal for a specific case study download? What would seem to be the easy answer—attach custom metadata (title in this case) to identify the recipe, really isn’t. As shown below, when defining a goal in Lift we are limited to the event name, the additional parameters cannot be used in the logic.
In this case, I would need to create a separate event for downloads of a particular case study. I’ll touch more on this in the goals section.
Naming Events
When naming events make sure you establish a clear pattern that anyone can easily understand. I personally always follow these rules:
- Use underscores for spaces
- If applicable, identify events by platform name as the prefix (marketo_lead_capture)
- Use the action type as the suffix (video_play, gtm_recipe_download)
Event Definition Workflow
Before we start defining events in Lift, it’s important to conduct a thorough measurement plan to identify the types of user actions and descriptive data we want to capture. Doing so enables us to not only define the user interactions we want to capture as events but the custom metadata as well.
If you haven’t created a measurement plan before, Avinash Kaushik’s model is a good starting point. Let’s assume we are a publisher and one of our key objectives is to increase customer engagement with our downloadable content. The success of that objective is measured by the key result of case study downloads.
To translate this requirement into an event we can use the following framework:
- Identify the purpose of the event (Segment, Goal, Reporting)
- Define the event type (Action, Click, Conversion)
- Decide whether additional metadata should be stored as a custom parameter
Make a copy of this Google Sheet Template to keep track of all of your custom tracking in Acquia Lift. (Don't request access—instead, choose File from the top navigation menu, and select 'Make a Copy').
Following up on our previous example, the event schema could look something like this:
Once we have defined the event schema, the next step would be to configure the event inside of the Acquia Lift interface.
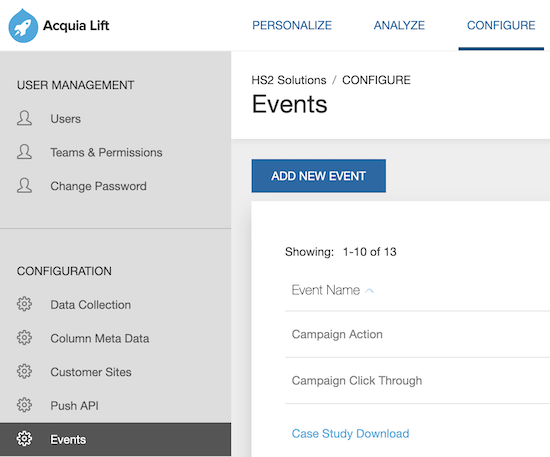
To do so login to Acquia Lift and click into the Configure tab on the top navigation. Next, select the Events tab in the sidebar navigation and click the Add New Event CTA. It’s as easy as that!
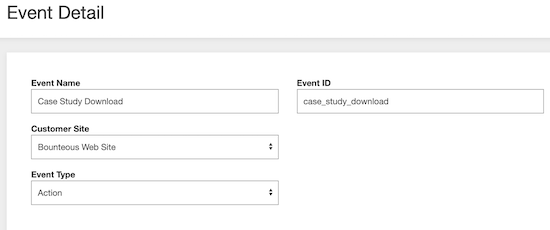
The only thing left to do is to fill out the event details with the values from our Google Sheet and we have successfully defined our first event! The only thing missing is the custom parameter data we wanted to store in the event_udf1 and event_udf3 slots, which we’ll discuss in the next section.
Adding Custom Metadata to Events
Once we’ve defined our events in Acquia Lift the next step is to configure our column metadata. Using the previous example, we want to track the custom parameters of event_udf1 and event_udf3. These will be used to identify the title and category of the case study. Tracking the category of the case study will allow us to match our newsletter banner content to the user's interests.
By capturing the title we could create future campaigns that recommend content, potentially a campaign like “Others interested in [case study title] found this [gated content] to be helpful as well.” We can use it for recommendations, newsletter signups to access gated content, etc. the possibilities are endless.
A few rules for defining custom parameters:
- Try to keep parameters as general as possible as there are only 50 available, technically 49 (event_udf2 is reserved).
- Try to reuse parameters rather than defining new ones for each event. For example, rather than using video_title and case_study_title, just use title.
- Reference what is already defined before configuring new parameters, check to see if you can use an existing parameter.
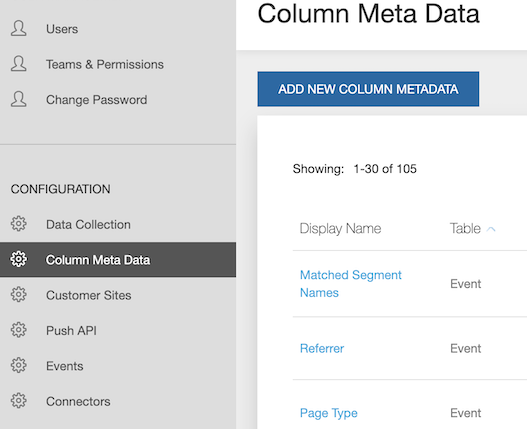
To configure column metadata in Acquia Lift navigate to the Configure tab in the top navigation, select Column Meta Data in the sidebar and click the Add New Column Metadata CTA.
Now it’s time to configure our first custom parameter for Downloadable Content Category. Before we jump in let’s familiarize ourselves with the fields and their respective functions.
Column Meta Data Fields:
| Column | Description |
|---|---|
| Display name | The name of the column metadata item |
| Table | The table to which this column metadata item belongs |
| Display order | The order in which this column metadata item appears in the Properties section of the Person Detail page |
| Is visible in person detail | Whether this particular column metadata item is listed in the Person Detail section of Lift Web. For more information about the metadata items that are visible in this section of Acquia Lift, see Examining visitor information |
| Is segmentable | Whether this column metadata item can be used as criteria in a segment to track website visitors’ behavior |
| Is rankable | Whether this column metadata item can be used to track the number of times that every permutation of values in this column has occurred, such as how many times a visitor has accessed your website, ranked by the type of platform on which the visitor accessed your website |
| Description | An explanation of the column metadata item’s properties, purpose, and possible uses |
| Actions | Additional steps you can take regarding this column metadata item, including deleting it |
You can find more detailed information about column metadata in Acquia’s official documentation.
If you’re using the Google Sheet template the process should be pretty straightforward as you’ve done most of the work ahead of time. Just make sure to select the correct table when defining metadata in this case, the event table.
After defining the column metadata to be used in the case_study_download event the next step is to implement our event tag using Google Tag Manager (GTM) and the Acquia Lift Custom Template.
Sending Case Study Download Events to Acquia Lift Using GTM
Now that we have our event and custom parameters defined in the lift interface it’s time to start sending data to Acquia Lift. As outlined in Enhancing Acquia Lift Personalization with Custom Tracking it’s easier than ever to implement custom event tracking with the Acquia Lift Custom Template.
If you read our post above by this point you should be able to define events, set up custom parameters in Acquia Lift, and import the Acquia Lift Custom template into your GTM workspace.
Once you’ve imported the Acquia Lift Custom template (if you haven’t already, read how to do so here) you will need to create a new tag using Acquia Lift Capture as the tag type.
Step One
Create a new event titled AcquiaLift - Capture - Case Study Download. Select capture type as event and enter the Event ID defined in Acquia lift for case study downloads (case_study_download).
The engagement score is an optional field that allows you to assign a value to the event, consider tying this back to the objectives identified in your measurement plan. For example, if you know that users who download a case study are twice as likely to sign up for a newsletter vs. those who watch a video, assign a greater value to your case study download events than you would for video interactions. For reference, a pageview has an engagement score of one.
At this point, we have our basics covered: capture type, event ID, and engagement score. Now it’s time to add our custom parameters.
Step Two
It’s time to add custom parameters and take event tracking to the next level! This is where things get a bit more complicated and may require help from a developer depending on how your site is structured. I’m going to reuse a dataLayer event that was implemented to send a case study download event to Google Analytics.
Whenever a user downloads a case study on your website an event is pushed into the dataLayer that allows you to extract the title and category of the case study.
The code snippet could look something like this:
dataLayer.push({'event':'case_study_download',
        'file' : {
                        'title':'Building a Brand through Data-Driven Audience Targeting',
                        'category':'audience segmentation'}
});
The first thing we need to do is add a custom parameter for the file category (event_udf1) in the Event Custom Parameter section of our tag. Next, create a dataLayer variable to retrieve the file category from the dataLayer as outlined below. Remember, you don’t need to create a new variable if you already have something setup to use with Google Analytics events. Just reuse it!
Repeat this process for event_udf3 and case study title. Once completed the tag should look like this:
Now that our tag is set up, it’s time to add a trigger and begin our data collection.
Step Three
You’re almost at the finish line, all that’s left to do is add a trigger. Since I had a developer add a dataLayer event for case study downloads I am going to use a custom event trigger. Every website is going to be different, you might not need a dataLayer push and could use a Link Click trigger instead.
If using a custom event trigger it should look like this:
Save the tag, preview your container, make sure the tag is firing when a user downloads a case study and you’re ready to start using the event in Acquia Lift!
Sending Data Made Easy
The built-in features of GTM combined with the Acquia Lift Custom Template make it easy to send event data to Acquia Lift by reusing variables and triggers used for Google Analytics Events. Use this blog as your guide to creating these advanced segments in Acquia Lift and be on your way to better and more advanced personalization.


