Enriching Adobe Campaign Standard Delivery Logs with Custom Data for Reporting
Modern marketing campaigns use a wealth of data. A single point of contact may reference customer demographics, promotional offers, predictive modeling, and more. When you use Adobe Campaign Standard (ACS) to orchestrate your campaigns, you get a wealth of out-of-the-box reporting which can enable you to gauge the impact of your campaigns.
Even with this wealth of information, it may still be necessary for you to enhance the ACS reporting options so they capture the custom information that makes your campaigns stand out. Every campaign also has its own unique set of Key Performance Indicators (KPIs), from revenue to engagement, which may require you to cross-reference your data with systems external to ACS. Having the richest possible data out of ACS may allow you to eliminate some of those cross-reference points.
The Problem: Testing Policies Aren't All Exact
There is an out-of-the-box field to track which variant of an email a customer received, assuming you're using the out-of-the-box variant testing in ACS. This is great if your content team only makes iterative changes through careful A/B testing because each variant is tied to specific content changes, however, not all testing policies are so exact. It can be difficult to go back after the fact if you want to discover what made a campaign successful.
Let's take a real-world example using an imaginary online shoe retailer. The variants of a retail email might display anywhere from one to three offers that can be redeemed on your website. One offer could be a "Buy One/Get One," another could offer "Free Socks with Purchase," and so on. A month later you're cross-referencing your campaigns with your revenue data, and you notice one email variant seems to have generated unexpectedly high sales. Good for you! Your reporting team even tells you that variant B of the email was responsible for a massive 20 percent lift during a particular campaign. That's great!
But does your team remember precisely what content was part of variant B from last month? How was it different from variant A? Were there C and D variants? Maybe the deciding factor wasn't the offers you presented: perhaps it was due to particularly effective customer segmentation combined with dynamic content, or any other set of factors. You'd have to do extra work to cross-reference this data against a variety of systems to put all the pieces together. If data were available at the profile/delivery level, there would be a single resource to query and use for reporting.
The Solution: Custom Data Extension
We're going to create a Custom Data Extension to record information about each promotional email coming out of a particular Workflow, then tie target data of the email to the customer who received it. This will enable you to reference the precise combination of segmentation, offers, or other information which may have influenced the success of your campaigns.
We're going to create a central cross-reference to preserve relevant customer data at the time of delivery, allowing for later lookups for reporting.
Our Custom Data Extension
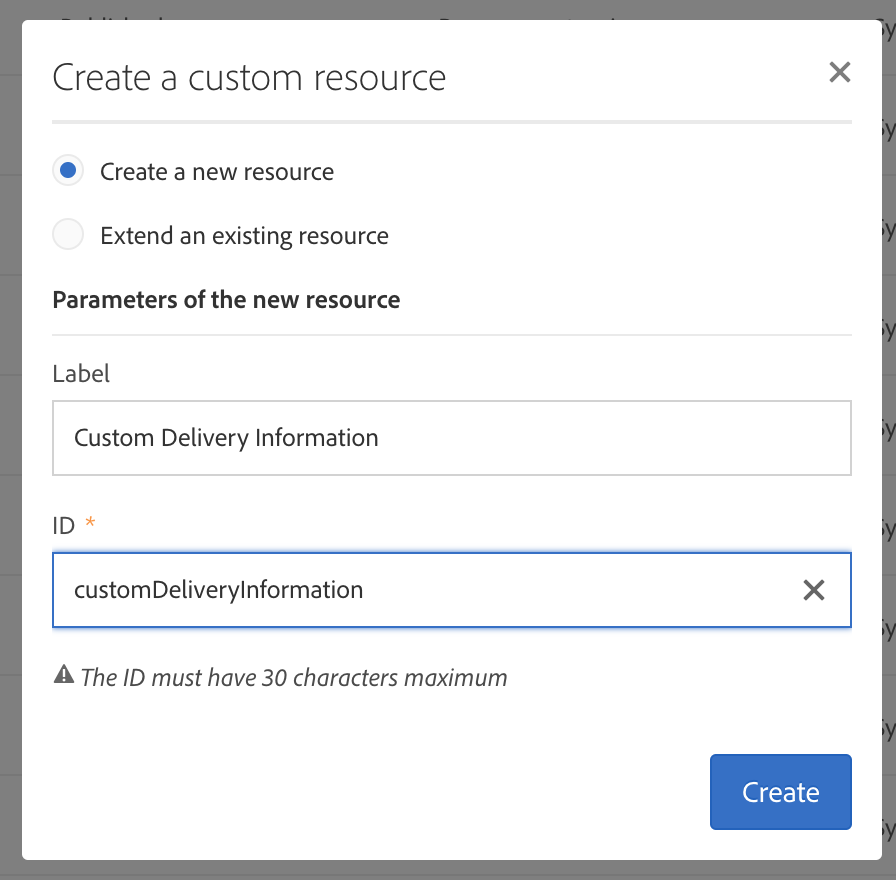
A Custom Data Extension both provides a home for the data and avoids cluttering the Delivery logs themselves. To create a new resource, click the Campaign button and navigate to Administration > Development > Custom resources, and click Create. Enter a label and ID, such as Delivery Assignments and deliveryAssignments respectively.
Now add fields to the custom resource. Let's say you want to record exactly what offer set you sent to a customer so that later you can report on this data to see whether customers who got a certain set of offers generated more revenue. Click Add field and set up a simple text field to hold the offers, such as Offer1, Offer2, and so on.
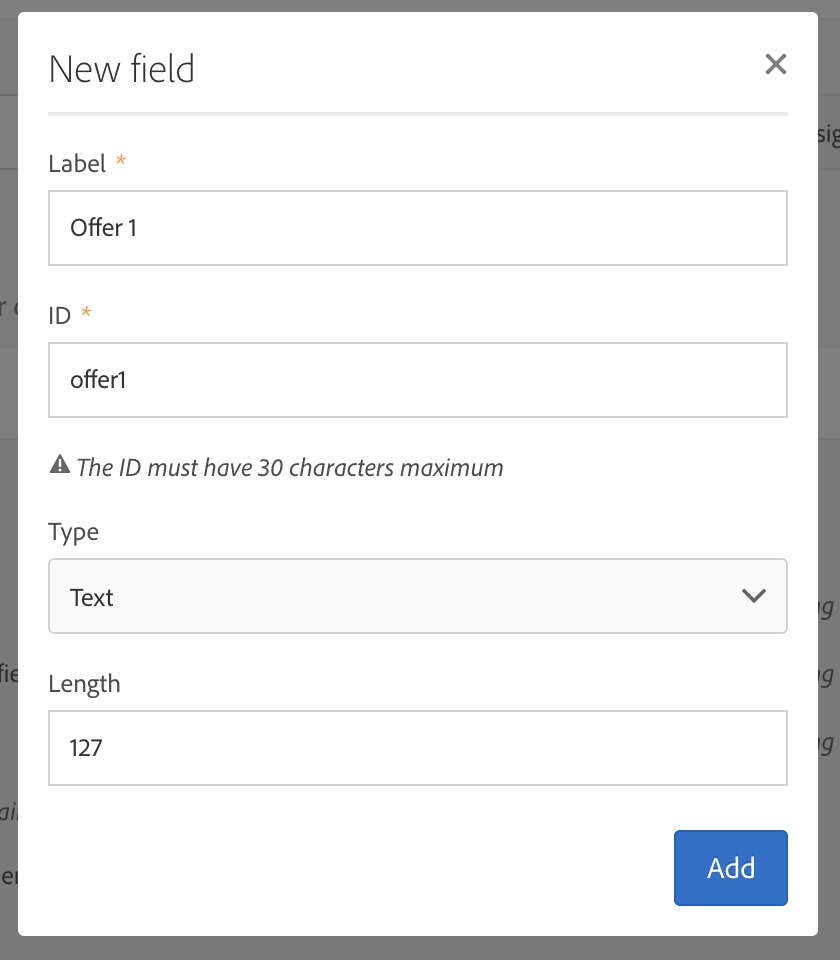
Add the rest of your fields. In our example, we want to tie Offer1 to a specific Email and the Send Date, so let's add fields for those. If we have multiple sends per day, we'll make sure the Date field captures Date and Time.
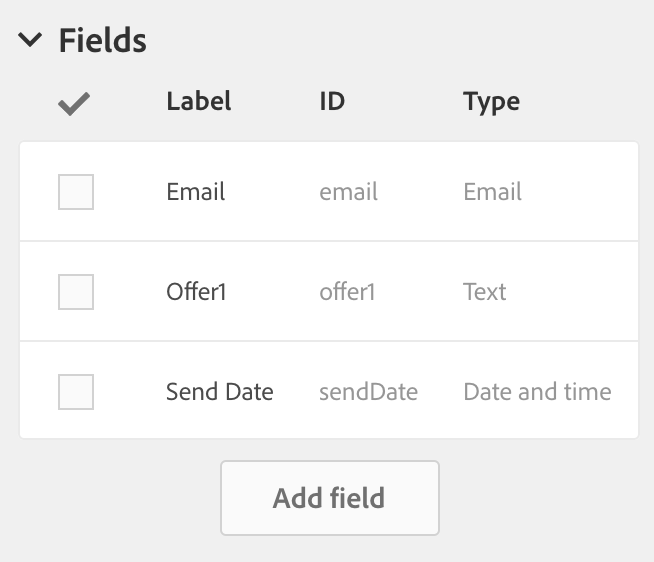
You may also want to set up an Identification Key and an Index. In our example, we might use Email and Send Time to generate a unique key.
Once you're finished, make sure you Publish your changes! Click the Campaign button and navigate to Administration > Development > Publishing. It is recommended that you schedule your Publish operations off-hours if possible, as there may be limited access to the database while changes are being made.
Next, we'll create a simple workflow to send an email and save our Custom Delivery Information.
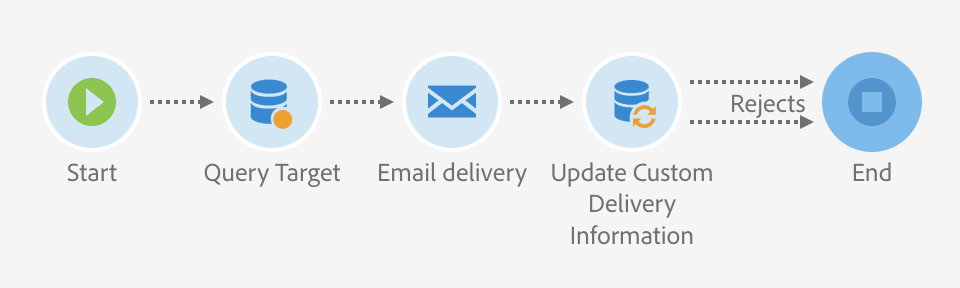
To give a quick overview of a simple workflow, we would set up:
- Start. To make it obvious to the user where the execution begins.
- Query. Define the audience for your send. (Renamed Query Target to make its purpose clear.)
- Email Delivery. Or the appropriate channel for your campaign.
- Update Data. This is where we'll save the relevant data. (Renamed Update Custom Delivery Information to make its purpose clear.)
- End. To ensure the user knows where the execution ends.
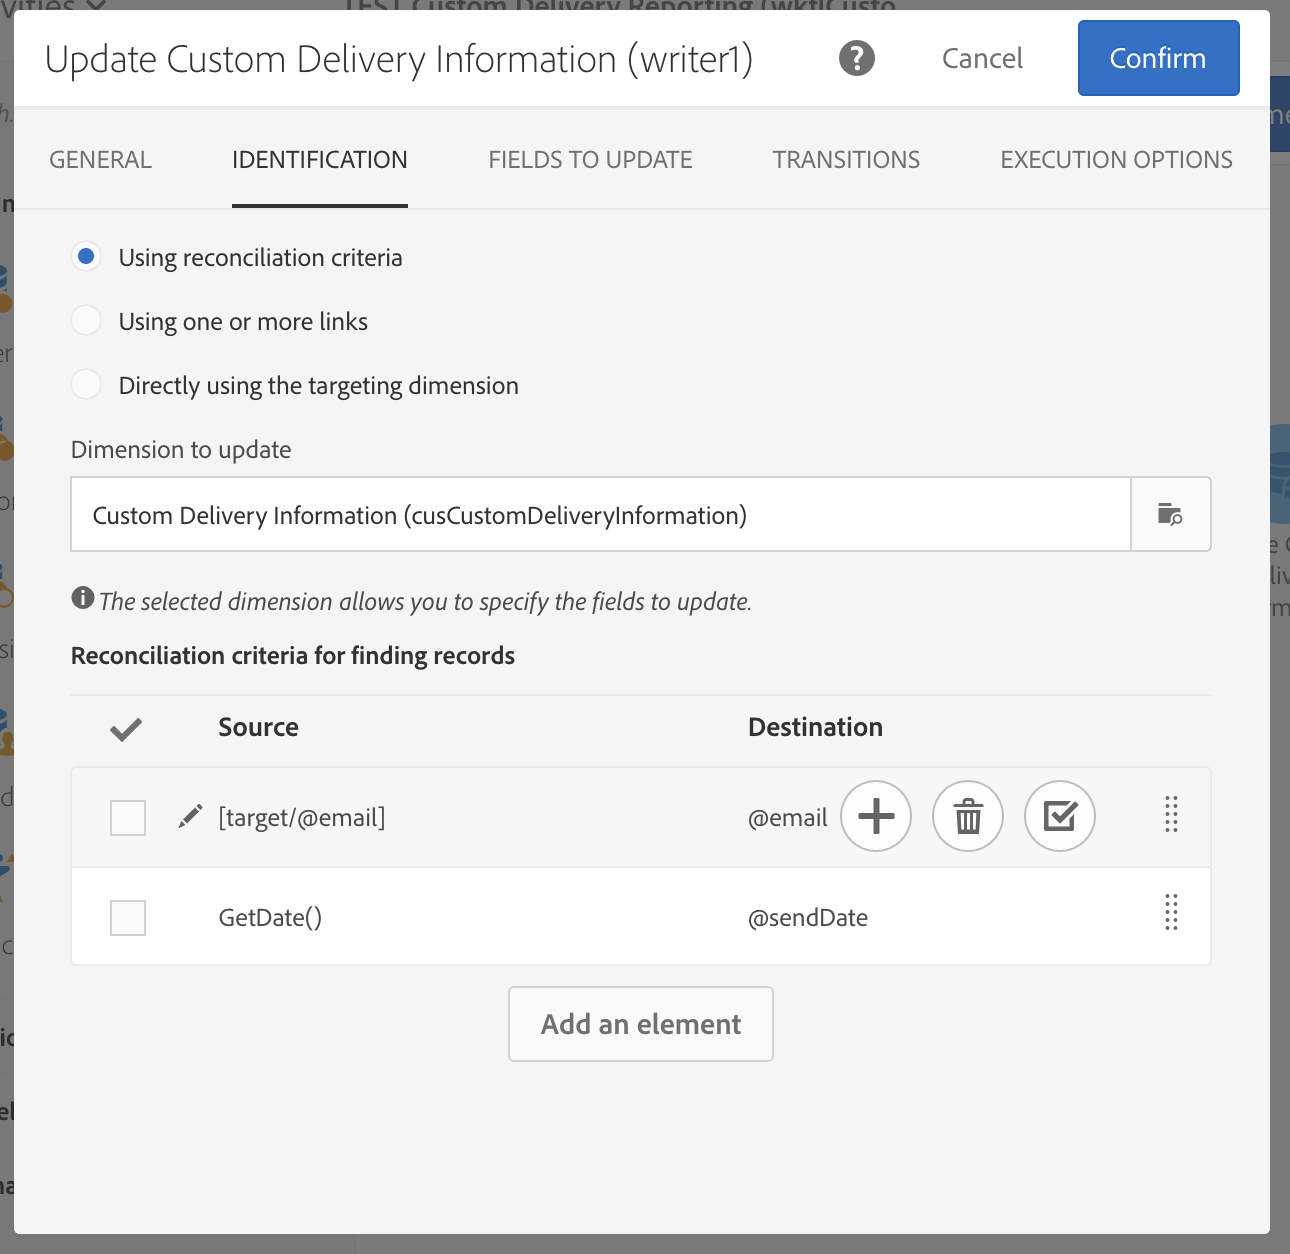
To set up the Update Data step, click the Update Data activity and click the pencil to edit. You can also double-click a step to edit. Update the Label to something readable, such as Update Custom Delivery Information. Click the Identification tab, where we want to tell ACS what record we intend to update. Select Using Reconciliation Criteria, and for Dimension select Custom Delivery Information, i.e., the custom resource created for this purpose. We want to set the value [target/Email] into @email, and we'll set the value GetDate() into the @sendDate field. This last GetDate() function will help uniquely identify this record.
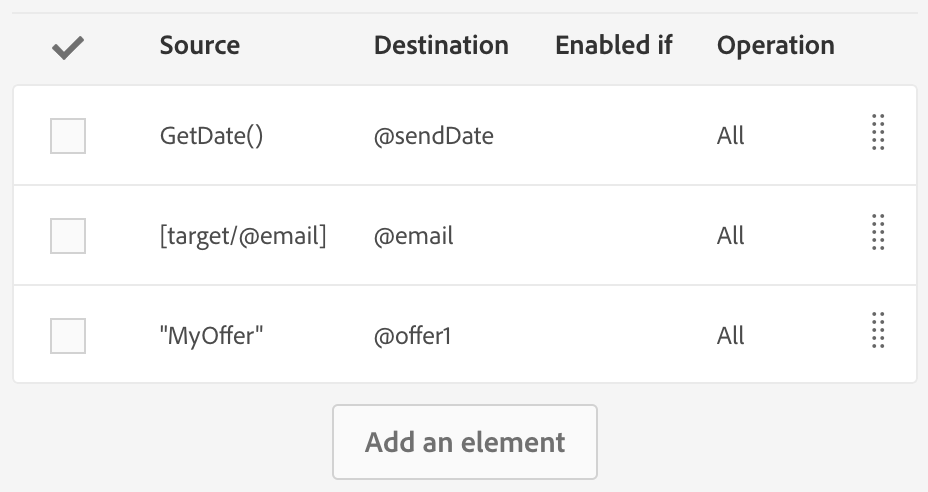
Now click on the Update Data tab. We'll copy the fields we used for reconciliation to ensure this unique record is written to the database. We’ll also want to set values into our desired fields for reporting. In this example, we'll set a hardcoded value of MyOffer into @offer1. Depending on how your workflow is set up, you may have access to a whole range of data to write into your desired fields. This is where you can capture all the campaign data which you may want to use in reporting.
Ensure you've connected all your transitions in order before you attempt to execute this workflow.
When you send this campaign, the desired data will be written to the Custom Delivery Information table. You can query this data inside of ACS using Query activities. You can also export the data out of ACS to use your own external reporting resources to slice and dice the data, gaining whatever insights the data has to offer.
Gain Excellent Insights Into Your Data
Modern marketing campaigns use a wealth of data. We discussed a way to capture more of this data for reporting purposes. We created a Custom Resource to hold the extra delivery information, and we demonstrated how to save that data for review. If you'd like to export this data to an external reporting tool, we have another blog post on "Exporting KPI Data From Adobe Campaign Standard."
By combining this information with sources to measure your KPIs—whether that be clicks or revenue—you should gain some excellent insights into your data.
News & Insights
Related Perspectives