IFrames For Facebook Part 1: How To Implement
Updated: October 28th, 2011
Customizing your company’s or client’s Facebook Page is vital in terms of branding and encouraging engagement across your network. Until recently, developers created tabs within a Facebook Page using FBML (Facebook Markup Language) to customize user experience with the brand. As of now, FBML is being deprecated, which is a fancy way of saying it will be removed in the future. Facebook Pages already using FBML will not need to worry about updating their customizations because they will remain unaffected if already in use, at least for a few years. Pages that haven’t installed the FBML application before its deprecation must now develop custom applications using iFrames.

iFrames allow designers to use HTML, CSS, ASP, JavaScript, Flash and more to create custom Facebook content for their Pages. With iFrames, your web content is maintained on an external server, which is then accessible and viewable on Facebook. This is a helpful improvement for designers and developers because it allows for greater freedom in the design and implementation of the content than FBML would have previously allowed. It’s also a wonderful asset to marketers because of the ability to add tracking code to install analytics, thus being able to monitor traffic and conversions. With frequent updates to the way in which information is presented on a Facebook Page, it’s essential to understand how to implement custom content using iFrames.
How to implement iFrames on a Facebook Page
1. Create an image for your Facebook landing page, also known as a page tab. You can use Adobe Photoshop, GIMP, Paint.net or FotoFlexer to develop your images assets. Your image for the landing page must be a width of 520px, but the height is unlimited. I don’t recommend the height of your image going past 800px. Save this image as a JPEG. You should look to make two versions of your landing page, one for non-fans and one for fans once they’ve liked your Page. It’s important to include the following on your landing page: a clear call-to-action, an understanding of what your Page is all about and an incentive to like your Page. With that being said, you want to create two versions of this image so it changes to provide value to your users once they’ve liked your Facebook Page.
2. Now that you have your images assets, upload it to your server via the FTP access on your website. If you have a WordPress hosted website, simply upload this image to your Media Library. Once you’ve uploaded this image asset, you’ll need to copy the URL from your website where your image can be found. Test this URL, just to make sure it uploaded correctly.

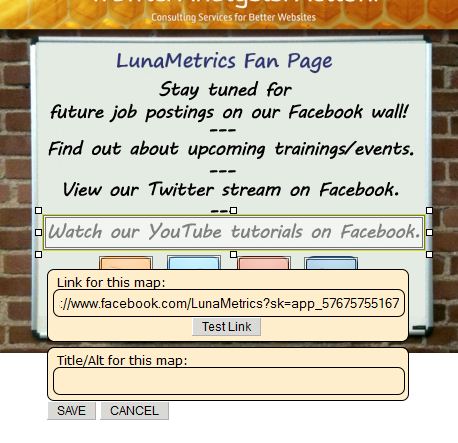
4. Paste this code into a text editor like Notepad and save this as an HTML file to keep for future reference, we’ll come back to this in a bit.
5. Now visit the Static Tab 2.0 application on Facebook to begin creating tabs for your Pages. This application, one of many available on Facebook helps you easily create your own tab without needing the know-how to create your own custom application. The best part about this application is that it’s completely free, which is uncommon among the other applications that help you perform the same functions. Scroll to the bottom and choose 1st tab to install your first Facebook Page iFrame tab. You’ll return here in the future to add more tabs to your Pages.
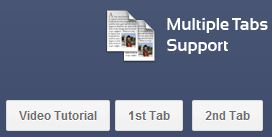
6. From here choose which Facebook Page you’d like to add this tab to by selecting one from the drop-down menu. Once you’ve selected the page, select the Add Static Tab- Welcome Tab for Pages button to add the tab.

7. This will now take you to the Page you’ve added the tab to. It’ll be on the left-hand navigation menu, labeled as Static Tab. Click on this item in the navigation menu to visit the tab and begin customizing your landing page. If you hover your mouse over the top of the tab, a grey options bar will drop down giving you the option to configure the current tab, add a new tab, view statistics about this particular tab and learn more about this application. The add a new tab function allows you to add another tab to this existing Page, similar to how you just added this tab to your Page. The statistics function allows you to look at the traffic to this tab over any range of time you define. You can also monitor visits to this tab in your Facebook Page Insights under the reach report. Let’s move on to configure this tab to make a custom landing page, helping convert browsers on your Facebook Page to fans.

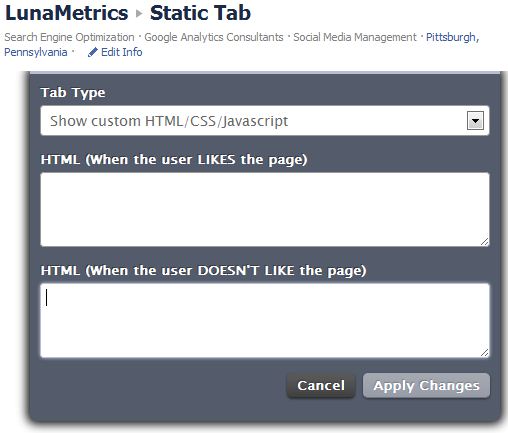
8. Now it’s time to paste in the assets you’ve uploaded and/or you created an image map with. Once, you click configuration you’ll have two fields to paste your code into. Before doing so, make sure to choose Show custom HTML/CSS/Javascript or Load an External URL from the first tab type field. In this example, we used the HTML/CSS/Javascript option. Paste the CSS code from Image Map you created in the first box to display the content to fans once they’ve liked your Page. In the second box, paste the CSS code you generated on Image Map to display this content to non-fans viewing this tab on your Page. Once you’ve done this, press Apply Changes.
9. Now view this tab and see if both versions of your landing page are working correctly. To test it, view this tab as a fan and a non-fan. After you’ve successfully set up this page tab, it’s time to name it. Go to Edit Page then Apps and the to Static Tabs. Choose Edit Settings to define the name of this tab, in our case we’ve labeled it Greetings! Don’t forget to save your changes and then press Okay.
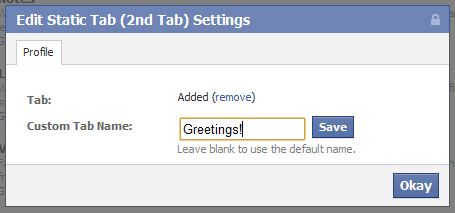
10 ) You’re almost done with your Page tab, all you need to do now (which is optional) is reorder it in the left-hand navigation and set it as your landing tab on your Facebook Page if you wish for non-fans to land on this tab when they initially land on your Facebook Page. To reorder the left-hand navigation menu, just click More than Edit to reorder which Page tabs are visible and in what order.
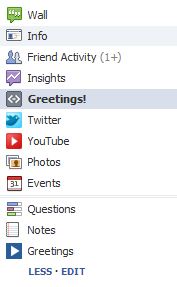
If you wish to set this newly created page tab as the landing tab all non-fans land on when they visit your Page (which I highly recommend) go to Edit Page, then Manage Permissions and select Default Landing Tab. This field will let you choose which tab on your Facebook Page users land on when they aren’t currently a fan. Once they are a fan, the user will automatically land on your Facebook Wall.
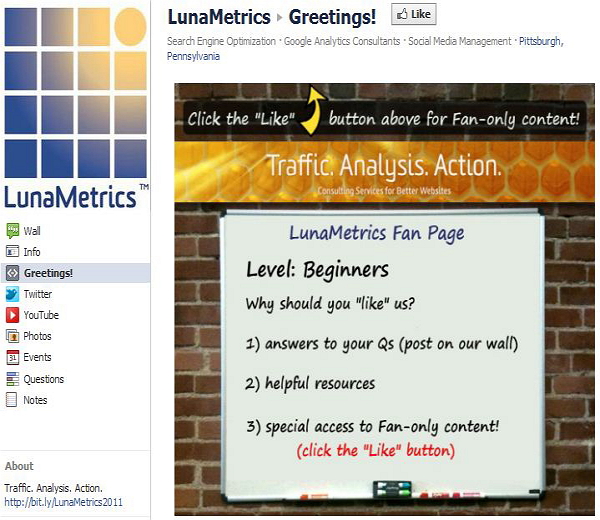
The finished product! Let us know if you have any issues with implementation or have other recommended ways of creating your own page tabs using iFrames!
