Classify Your Blog Posts In Analytics Using Content Groupings
Today we are going to go on a quest to find the scientifically-proven best blog post ever. We will do so with math.
We have a hypothesis: the best blog post ever must contain these five things:
A handful of tasteful images
A YouTube video
A length between 1200 and 1500 words
A concise title
Published on a Friday
On December 19th, Google Analytics introduced a new feature called Content Grouping. Long in the making, this feature allows analysts to combine common pages by way of Rules, URL/Title Extraction, or with a piece of JavaScript placed on those pages.
Then, just yesterday, Google Tag Manager introduced an integration with this piece of JavaScript, so that its built-in Analytics tags could define content groupings based on Rules/Macros.
And there was much rejoicing.
Our Quest
On this journey, I will show you how to classify your blog posts inside Analytics, using Google Tag Manager, so that you can see which components of your blog posts lead to the lowest bounce rates, the greatest time-on-page, and ultimately the most conversions.
Thou wilst need jQuery for this demo, and Google Tag Manager.
(I really strongly recommend that you create a brand new View for this demo, so that if you decide you don’t like these Content Groupings you can just delete the View and not pollute your existing data! Currently there is no way to delete a content grouping once you create it!)
Step 1:
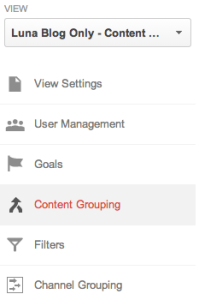
The first thing we’re going to do is log in to Google Analytics and define five content groups. Visit your Admin and look under View Settings for “Content Groups.”
The Groups will all use the “Tracking Code” configuration method. We will name the first group, “Blog Post Images“. Click “Group by Tracking Code”, select Index 1, click Done, and then click Save.
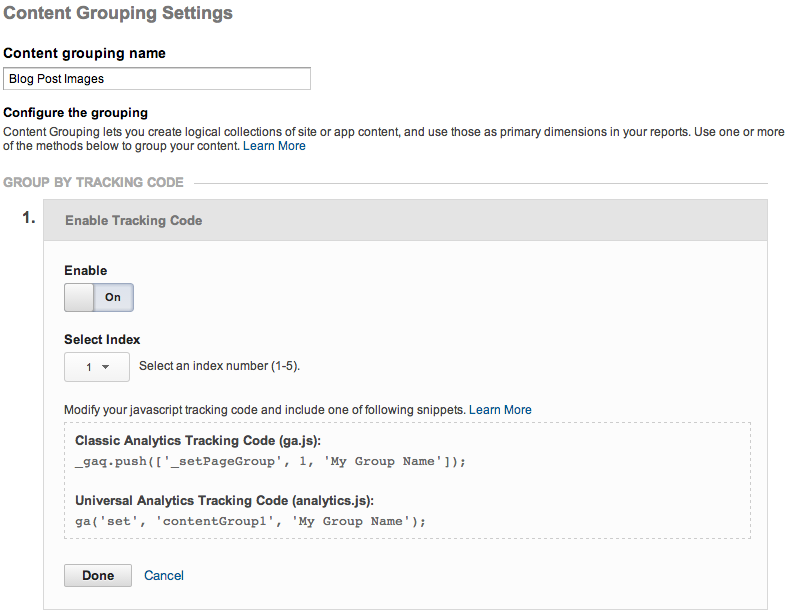
Then, rinse and repeat for all content groupings, selecting the appropriate Index for each:
| Content Grouping Name | Select Index |
| Blog Post Images | Index 1 |
| Blog Post Videos | Index 2 |
| Blog Post Length | Index 3 |
| Blog Post Title Length | Index 4 |
| Blog Post Publish Day | Index 5 |
Step 2:
Now log in to Google Tag Manager and visit the container for your website. If you already have created a Universal Analytics built-in tag — or even the Traditional Analytics tag — you can use that one and skip the next paragraph.
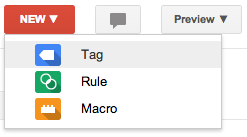
Otherwise, we are going to create a new tag for “Universal Analytics (beta). Click on the “New” button and select “Tag”. Name the tag “Universal Analytics GATC – Blog Posts“. We need to give it the correct Tracking ID (it starts with “UA-“) from the tracking code, and choose “Page View” as the “Track Type”. We’ll also give it a Firing Rule for “All Pages” on our website, or we’ll create a rule which tells the tag to only fire on our blog… it’s up to you.
Now we’re going to take advantage of a brand new feature (added yesterday!) in Google Tag Manager which allows us to pass content groups through the built-in Analytics tag. Look under “More settings (optional)” for Content Groups, and add the following five Indexes and “Content Groups“. We’re going to be making a reference to some macros that we’ll define in a moment, using brackets {{}} to indicate a macro name.
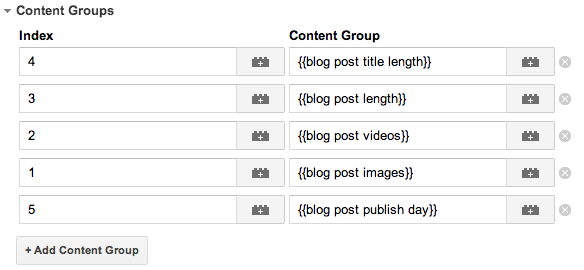
The plain text for those macros is below:
| Index | Content Group |
| 1 | {{blog post images}} |
| 2 | {{blog post videos}} |
| 3 | {{blog post length}} |
| 4 | {{blog post title length}} |
| 5 | {{blog post publish day}} |
Click “Save” to save the tag.
Well done! Our quest now takes us into the strange and sometimes harrowing Land of JavaScript. But do not fear! There is light behind every shadow.
Step 3:
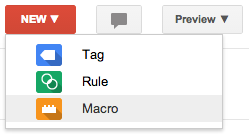
This step is really five steps in one: we’re going to create a new macro for each of our new content groups. Macros are Google Tag Manager’s way of pulling information off of a page, to be used in Rules and Tags. These macros are going to search through each blog post and count the number of images, number of videos, blog length and title length, and set the day of the week the post was published!
Macro #1: blog post images
We are assuming that each blog post is contained in a <div> tag with an id of “content”. (This is common with WordPress blogs.) You will need to inspect your source to ensure that this is the case for your blog. Also, we are assuming that each of our blog images have a class defined with the name “wp-image”.
Create a new macro called “blog post images“, with “Macro Type” set to “Custom JavaScript”. Then insert the following JavaScript:
function() {
    var numImages = $("#content img[class*='wp-image']").length;
    if (numImages>20) return "21+";
    else if (numImages>15) return "16-20";
    else if (numImages>10) return "11-15";
    else if (numImages>7) return "8-10";
    else if (numImages>5) return "6-7";
    else if (numImages>3) return "4-5";
    else if (numImages>1) return "2-3";
    else if (numImages>0) return "1";
    else return "0";
}
This script looks through all the images on your page, inside <div id=”content”> counting images whose class contains “wp-image”. It will then return an image count to our first Content Grouping.
Save this macro and get ready for number two.
Macro #2: blog post videos
Similarly, we’ll now count the number of YouTube videos on the page. Create a macro called “blog post videos“, with Macro Type “Custom JavaScript”. Add this code and save the macro:
function() {
    var regex = /(?:https?:)?\/\/www\.youtube\.com\/embed\/([\w-]{11})(?:\?.*)?/;
    var content = $("#content").html();
    var matches = content.match(regex);
    if(matches && matches.length > 1) {
        var numVideos = matches.length - 1;
        if (numVideos>9) return "10+";
        else if (numVideos>7) return "8-9";
        else if (numVideos>5) return "6-7";
        else if (numVideos>3) return "4-5";
        else if (numVideos>2) return "3";
        else if (numVideos>1) return "2";
        else if (numVideos>0) return "1";
        else return "0";
    }
    else {
        return "0";
    }
}
Macro #3: blog post length
For length we are going to count the number of words in the plain text (non-HTML content) inside <div id=”content”>. Create a new macro called “blog post length” and add this Custom JavaScript:
function() {
    var wordCountTemp = $("#content").text();
    wordCountTemp = wordCountTemp.replace(/(^\s*)|(\s*$)/gi,"");
    wordCountTemp = wordCountTemp.replace(/[ ]{2,}/gi," ");
    wordCountTemp = wordCountTemp.replace(/\n /,"\n");
    var wordCount = wordCountTemp.split(' ').length;
    if (wordCount>3000) return "3k+";
    else if (wordCount>2500) return "2.5k-3k";
    else if (wordCount>2000) return "2k-2.5k";
    else if (wordCount>1500) return "1.5k-2k";
    else if (wordCount>1100) return "1.1k-1.5k";
    else if (wordCount>800) return "800-1.1k";
    else if (wordCount>500) return "500-800";
    else if (wordCount>200) return "200-500";
    else return "<200";
}
Macro #4: blog post title length
The blog post title length macro is very similar. Here we'll refer to the <title> element of the page, but you might choose the <h1> instead.
function() {
    var wordCountTemp = document.title;
    wordCountTemp = wordCountTemp.replace(/(^\s*)|(\s*$)/gi,"");
    wordCountTemp = wordCountTemp.replace(/[ ]{2,}/gi," ");
    wordCountTemp = wordCountTemp.replace(/\n /,"\n");
    var wordCount = wordCountTemp.split(' ').length;
    if (wordCount>20) return "21+";
    else if (wordCount>16) return "17-20";
    else if (wordCount>12) return "13-16";
    else if (wordCount>10) return "11-12";
    else if (wordCount>8) return "9-10";
    else if (wordCount>6) return "7-8";
    else if (wordCount>4) return "5-6";
    else if (wordCount>2) return "3-4";
    else return "<3";
}
Macro #5: blog post publish day
Finally, our last macro, blog post publish day will return the day of the week that the post was published! For our demo, we are going to assume that your blog post URLs have the same format as LunaMetrics' blog posts: a URL format like 2014/01/24/. Your regular expression will be different if your URLs are set up differently.
(If the publish date is not included in your URLs, you could write a different macro to scan the page for the post date... but each situation will be different and your mileage may vary.)
function() {
    var url = document.URL;
    // For URLs with form: 2014/01/24/
    var matches = url.match(/([0-9]{4})\/([0-9]{2})\/([0-9]{2})\//);
    if(matches && matches.length > 1) {
        var blogDate = new Date(matches[1],matches[2]-1,matches[3]);
        var d = ['Sunday','Monday','Tuesday','Wednesday','Thursday','Friday','Saturday'];
        return d[blogDate.getDay()];
    }
}
Step 4:

We're almost done. Now that we've created the tag and the five macros we need, we will create a new version and click "Publish".
And now...
Our journey is almost over. Now we must wait. You can't see content groups appear in the Real Time reports, and unfortunately your data will take a little while to populate in the new reports. For now our quest brings us pause, and reflection.
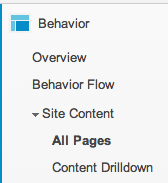
In a few hours, we can visit the All Pages report, inside Behavior > Site Content. You'll now see that our new Content Groupings are available as a new Primary Dimension!
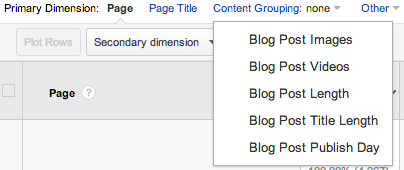
If our quest was successful, after a few hours, you'll begin to see some data in these reports!
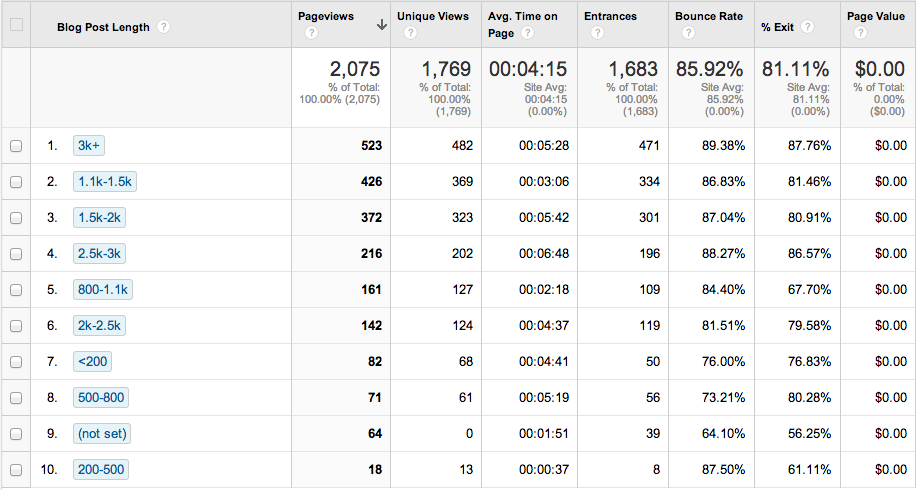
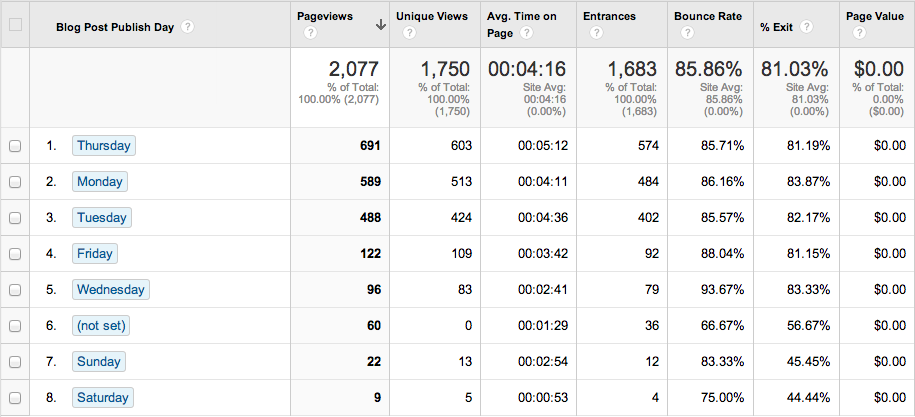
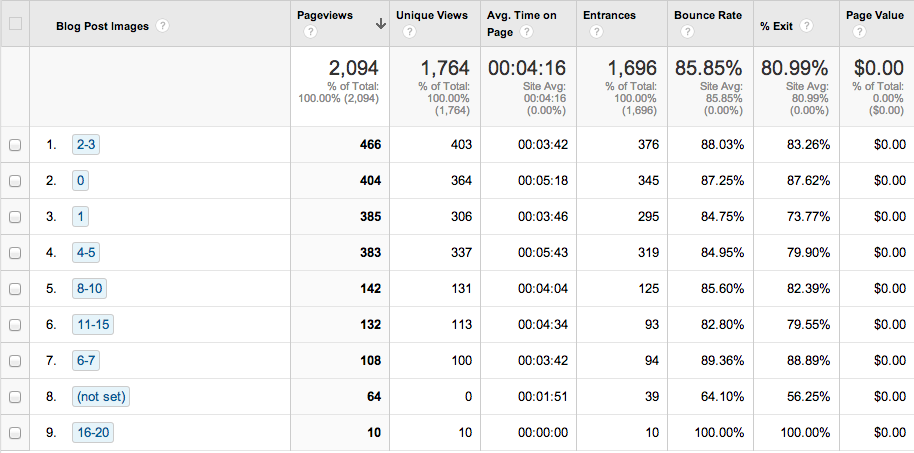
Our journey comes to an end.
You can consider the new Content Groupings essentially to be a simplified form of Content Experiments. We can examine this data, look at bounce rates, % exit rates, conversion rates, and make decisions about how to formulate our blog posts: how long should our posts be, what days should we publish, and how many images and videos should we include.
And there was much rejoicing.


