Tracking Customer Lifetime Value In Google Analytics
In marketing, customer lifetime value (CLV), also referred to as lifetime value (LTV), is a prediction of the value a customer will have over there lifetime with your company or brand. This is often estimate, or averaged, sometimes with complex formulas.
This topic has been thoroughly covered by some excellent posts, and several books, so I don’t intend to regurgitate what’s already been written. My goal is to introduce another method of tracking CLV with Google Analytics.
Instead of estimating CLV with simple (or complex) formulas, I’ll have you recording the actual lifetime value of each and every customer by the end of this post.
Two Methods: Custom Dimensions and Custom Metrics
You might think that a value like CLV should be tracked as a custom metric, because it’s a number. And you’re right, partially. But there are some limitations and pitfalls to be aware of when using this method.
Custom dimensions can also be used to track CLV, and should be used in conjunction with custom metrics. Each option has benefits and drawbacks.
Custom Dimensions
Pros:
- Can be used with Data Import
- Can reflect the CLV of a user at any time (not dependent on the data range of the report)
- Easy to get a distribution of users by CLV
Cons:
- Can’t easily segment by users with greater than or less than a certain CLV
- Can’t report the average CLV per channel, region, etc.
Ed Brocklebank of Metric Mogul has written an incredibly detailed and complete post on tracking CLV with custom dimensions. I highly recommend reading through it and setting those up.
However, there is still some benefits to be had by tracking CLV with custom metrics. That’s what I intend to show you.
Custom Metrics
Pros:
- Can be used to show average CLV of users
- Can be used to show average CLV by segment (channel, region, etc.)
- Can be used to segment users with greater than or less than a certain CLV
Cons:
- Can only report CLV for date range selected. If you have a long date range and a lot of traffic, your data is likely to be sampled
Create the Custom Metric
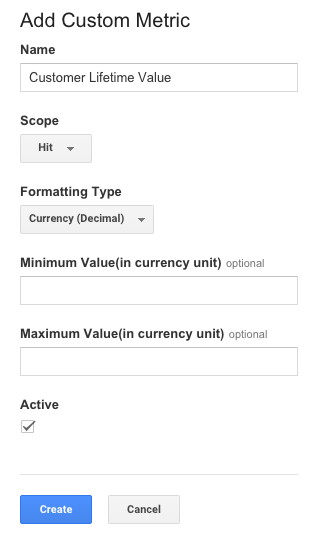
First things first – you’ll need to create the custom metric in the Admin of Google Analytics before you can start sending values to it. Under the Property column, click through to Custom Definitions > Custom Metrics and create a new custom metric for your CLV like below:

Write down the index of the custom metric, you’ll need that in the next step. The index is a number from 1 to 20, which tells Google Analytics where to store the value. If this is your first custom metric, it will be at index 1.
One single line of code
Whether you have Google Analytics hard-coded on your site or implemented through Google Tag Manager, the code required to track CLV with custom metrics is actually quite simple.
On the receipt page where you include your ecommerce tracking code, you need to include an extra line that sets the order value as a custom metric. With hard-coded Google Analytics, you’ll typically be sending the transaction and items details along with the pageview hit (with enhanced ecommerce), so you just need to update your pageview to include the custom metric.

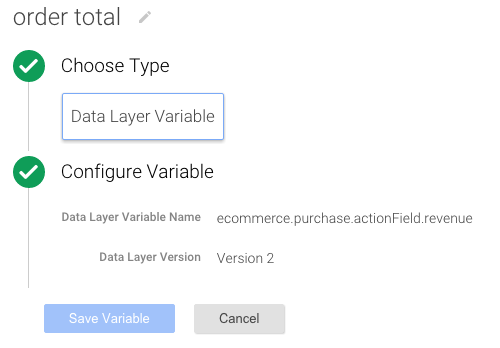
If you’re using Google Tag Manager, you’ll just need to capture the order value with a variable. You may already be doing this, and you likely have the transaction details in the dataLayer. If that’s the case, you can create a dataLayer variable to pull out the order value like below:

Then you can use that variable in whichever tag sends along the transaction (either a pageview tag or an event tag) by adding it to the Custom Metrics section under More settings, like below:

Now that you’re getting the order value as a custom metric, you’ll want that to be associated with a specific user. For that, you’ll need to track a unique ID for each user as a user-scoped custom dimension. My colleague Amanda Schroeder covered the basics of setting up custom dimensions in her post about using custom dimensions to define audiences as well as getting even more advanced by setting up a User ID View.
For the unique ID, you may be able to use a value from your database or CRM for the user.
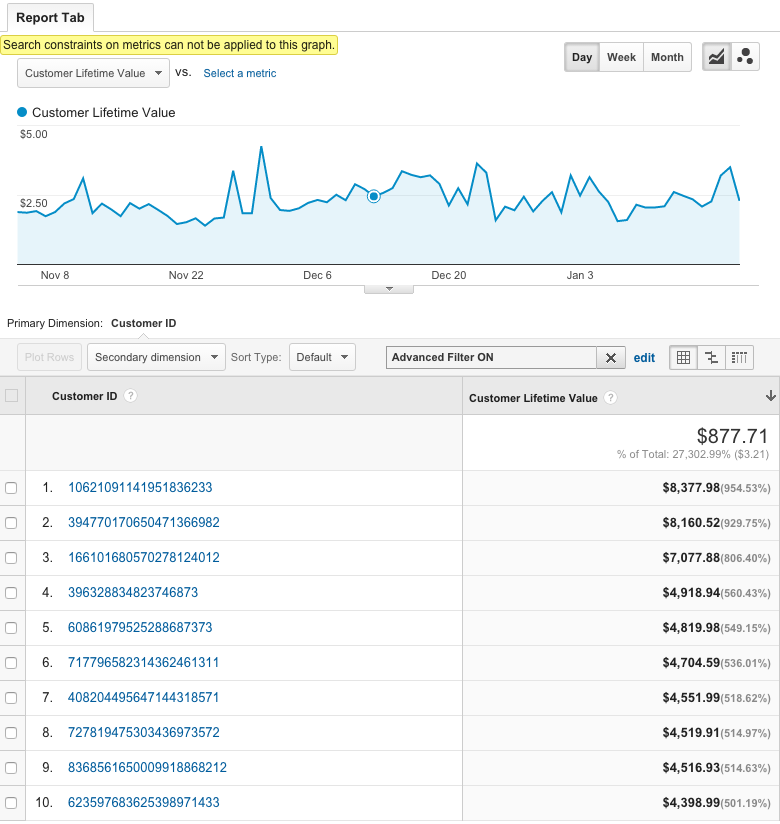
Once you have those two pieces in place, you can create a custom report like this one:

Remember, the Customer Lifetime Value metric here only includes revenue that occurred during the date range selected. So if a user purchased prior to that period (or after) it won’t be included. I’ve also filtered the custom report shown above to include only rows where Customer Lifetime Value is greater than 0.


