How To Use The Google Analytics Settings Variable In Google Tag Manager

One of the benefits of Google Tag Manager (GTM) is the option to configure advanced settings and fields within each individual tag. This provides granular control, which can be valuable in many cases, but you also might end up doing more repetitive configuration and maintenance than you’d like.
Let’s say I need to set up a few Google Analytics event tags. I know that the tags will all have the same tracking ID, cookieDomain setting (auto), and a few hit-scoped Custom Dimensions.
Until recently, you’ve probably been using one of the following methods:
- Create each tag from scratch and manually configure settings for each.
- Configure one tag, then copy and rename it.
Maybe one of those is working pretty well for you so far!
But… maybe you’ve just gotten a request to add 150 new Google Analytics tags, and you realize that starting with a blank slate for every tag isn’t very efficient. Plus, even if you copy tags, any changes that you need to make later (like adding Custom Dimensions) will still have to be done manually.
Well, don’t cancel your weekend plans yet (I mean, assuming your plans were to manually configure all the settings for 150 tags in GTM), because GTM just rolled out an exciting new feature!
It’s called the Google Analytics Settings variable, and it acts as a ‘template’ where you can configure Google Analytics settings for use across multiple tags.
Published: February 15, 2016
Where Do I Start?
You can create a new Google Analytics Settings variable from the Variables section, or directly from within a Universal Analytics tag.
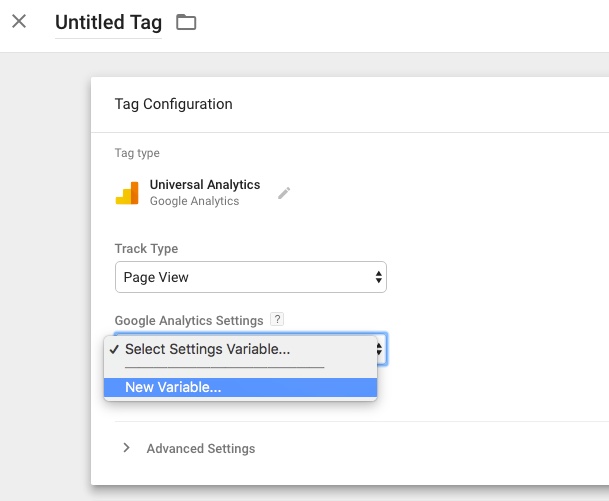
If you’ve been using GTM already, you’re probably familiar with the options in the Google Analytics Settings variable. At a super basic level, you can add your GA Tracking ID (or whatever variable you’re using for your GA IDs).
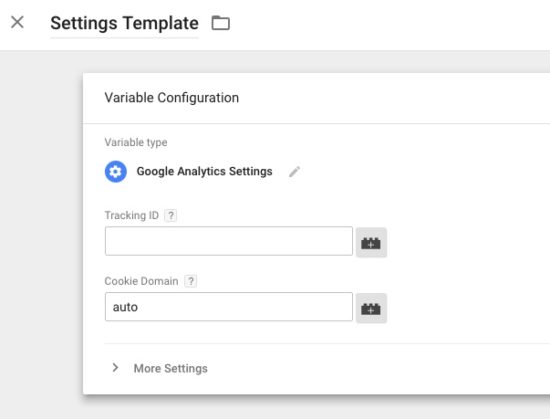
One great change is that the cookieDomain is now set to ‘auto’ by default, so we don’t need to add it under Fields to Set. We’ve talked about the importance of this in our blog on subdomain tracking, and it’s great to see that a default setting in the Google Analytics snippet is now also the default option inside of Google Tag Manager.
Published: August 11, 2016
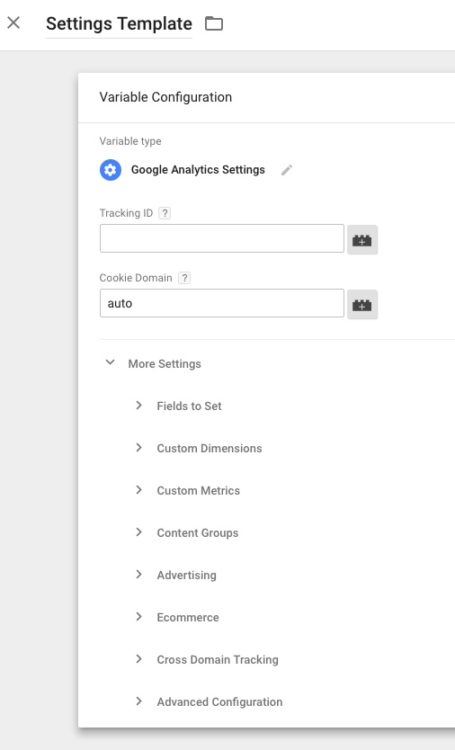
The advanced settings are basically the same as the individual tag settings you’ve seen in the past, so you can configure the following:
What Settings Should I Enable?
The Google Analytics Settings variable works well for any settings that are universal across Google Analytics pageview and event tags. For instance, if you’ve been configuring the same Custom Dimensions and Content Groupings on every new tag you set up, the settings variable will save you some time.
Do I Have to Use the Google Analytics Settings Variable?
You’re not forced to use it… but we highly recommend it to help future-proof your implementations, reduce errors, and keep settings consistent across your Google Analytics tags.
Option 1: All In!
If you’re sold on completely using the variable’s settings for your tag, just choose your variable that you created from the dropdown and move on with your life. After all, you’ll have more free time now (but at least take a few of those minutes to read about the other options).
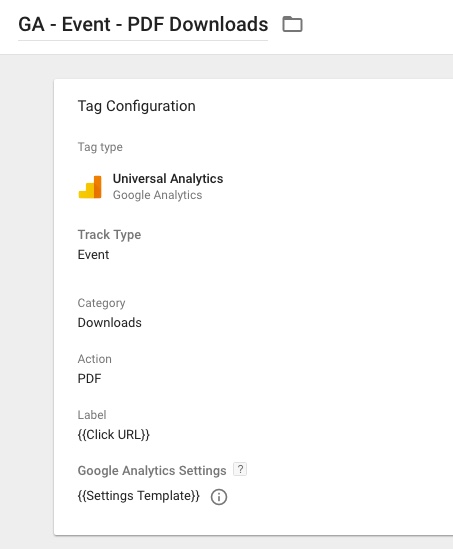
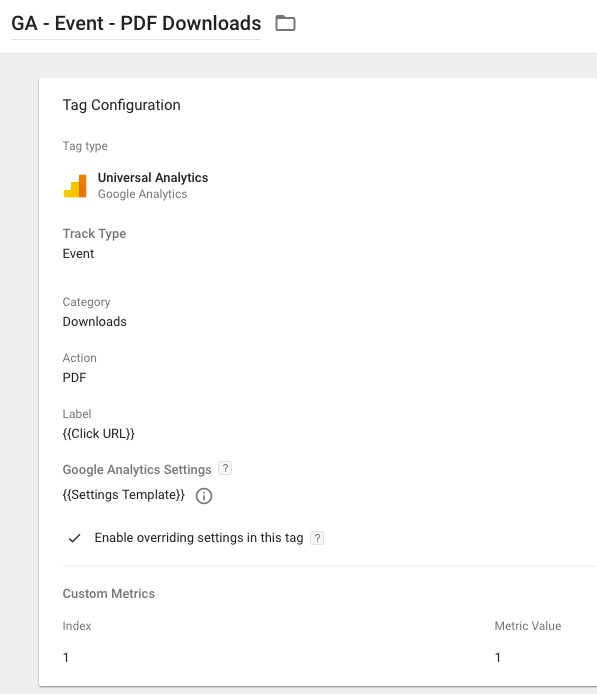
But, there are some things that you might NOT want to configure in the Google Analytics Settings variable. In most cases, Custom Metrics are tied to a specific event or pageview, so you wouldn’t want to set those metrics across all of your tags. In addition, due to the complexity of Enhanced Ecommerce implementation and how the dataLayer behaves by default, you will probably want to configure Enhanced Ecommerce settings outside of the Google Analytics Settings variable.
Option 2: Start Small
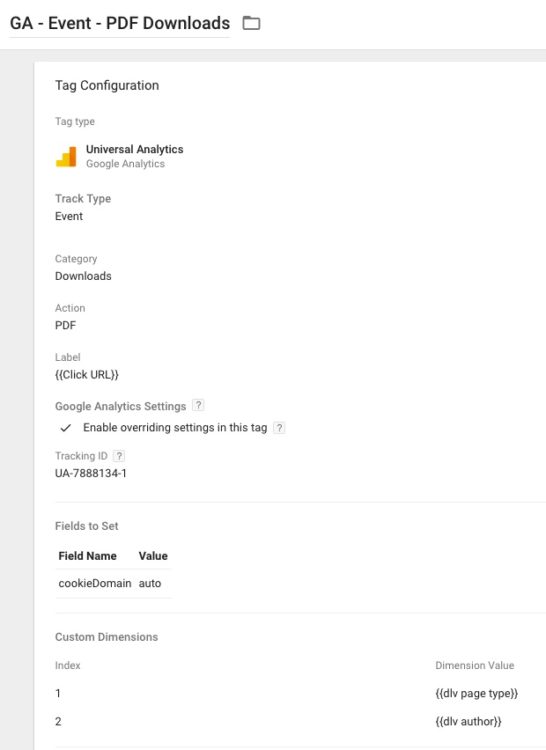
If you want to use the settings variable, but only for a few things, you can. You’ll set up a settings variable and select it from the dropdown, but you’ll also check the box within the tag to ‘Enable overriding settings in this tag.’ Then you can override individual fields from the settings variable by adjusting the settings in the tag.
Option 3: I’m Not Ready Yet!
If you don’t like shiny new things or if you just hate being efficient (Too passive-aggressive? Can you tell how much we like this feature?), you don’t have to create a settings variable at all. You simply check the override box, then you can still configure all of the settings within an individual tag just like you used to. Okay, so you might need time to test and plan within your organization, which is totally fine, but don’t make this a permanent plan; you should definitely set a timeline to make the switch.
One important thing to note is that any Google Analytics tags that you set up in the past were already automatically updated to have the checked override option, but retain all of your original settings on a per-tag basis. You can update these if you’d like or just use the settings variable option for any new tags going forward.
Ultimately, it makes sense to start trying out the Google Analytics Settings variable. When new features are added or products are released, there’s an unrecognized or undervalued benefit to to periodically reviewing your setup and implementation. The new Settings variable may seem like “just one more thing” that you have to do, but trust us that future-You will appreciate it if you take this opportunity to review your setup, correct any mistakes or inconsistencies, and standardize your implementation.
As always, if you have a complex tracking setup in GTM, make sure that you plan ahead and test well! But it’s a great new feature in Google Tag Manager that can help you cut down on some of the more repetitive Google Analytics tag configuration. Standardized settings can help you ensure that tags are configured consistently and correctly as your tracking infrastructure evolves, which is important for any organization.
News & Insights
Related Perspectives