Empowering Marketers with Adobe Experience Platform Test Profiles

Launching a successful marketing campaign with Adobe Experience Cloud means following a thorough process of strategic planning, building, and testing to ensure a smooth go-live. The testing phase can be tedious, but Adobe Experience Platform’s test profile feature shoulders much of that burden. Test profiles are created in Adobe Experience Platform and act as a regular customer profile, however have a flag of “test profile” as a safety net. They can be reused or created for the purpose of testing a single campaign. Once they live on the platform, they will follow the profile time to live defined by your organization or can be deleted by removing the dataset they were created with.
There are multiple ways to create these profiles within Adobe Experience Platform with some being more technical (API calls) and others more marketer-friendly, hence what we are discussing in this article.
Prerequisite Recommendations
Let’s jump into how to create these profiles using csv files, existing schemas, and datasets. There are some prerequisites to uploading test profiles:
- You’ll need to ensure you have the details of what you need in your test profiles thought out before beginning this process.
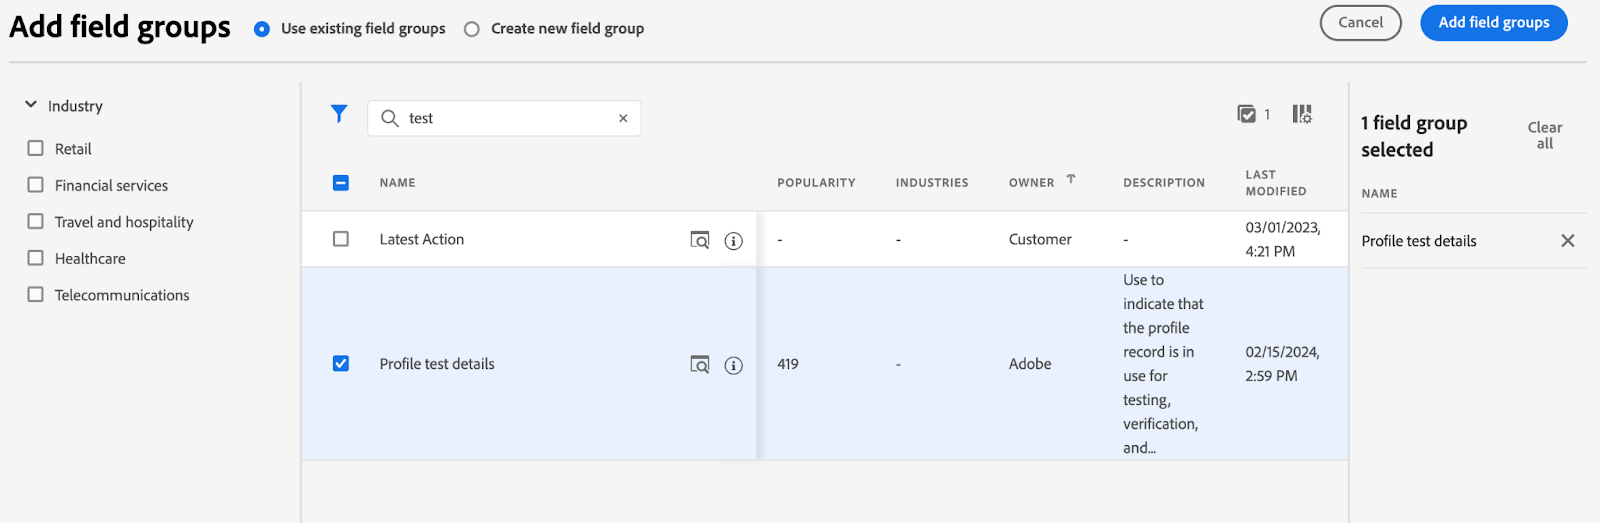
- The schema used to create the individual profile (XDM Individual Profile) needs to have the “profile test details” field group enabled so that your sample profiles will read correctly into the datasets. (This does not need to be done on XDM Experience Event schemas)
- It is recommended to create a sample dataset (a copy of the main dataset by creating a new dataset based on the same schema as the main dataset) to use solely for the purpose of uploading test profiles; whether doing so in a development or production environment.
- This means if something goes awry, it is an easier fix by deleting the sample dataset and starting fresh for test profiles rather than deleting the main dataset and having to reload all other data as well.
Creation & Considerations
Now we can begin creating the test profile csv we want to upload into our sample dataset created. It is important to understand the required fields to create a new profile within the profile dataset ie; knowing the primary and secondary IDs and any other fields such as email or phone number that are important to your testing. The csv file should be structured as Adobe has pointed out in their documentation. Follow this step-by-step process to upload your test profiles.
Helpful Hints
- Be sure there are no extra or trailing spaces in the cells of your test data csv. This will cause an error when uploading into the dataset
- For each dataset, you must use a separate csv file. You cannot use various sheets in the same file to upload into different datasets in Adobe Experience Platform
- If you run into any issues uploading dates and timestamps into your test profiles, leverage a calculated field to transform your input into a date().
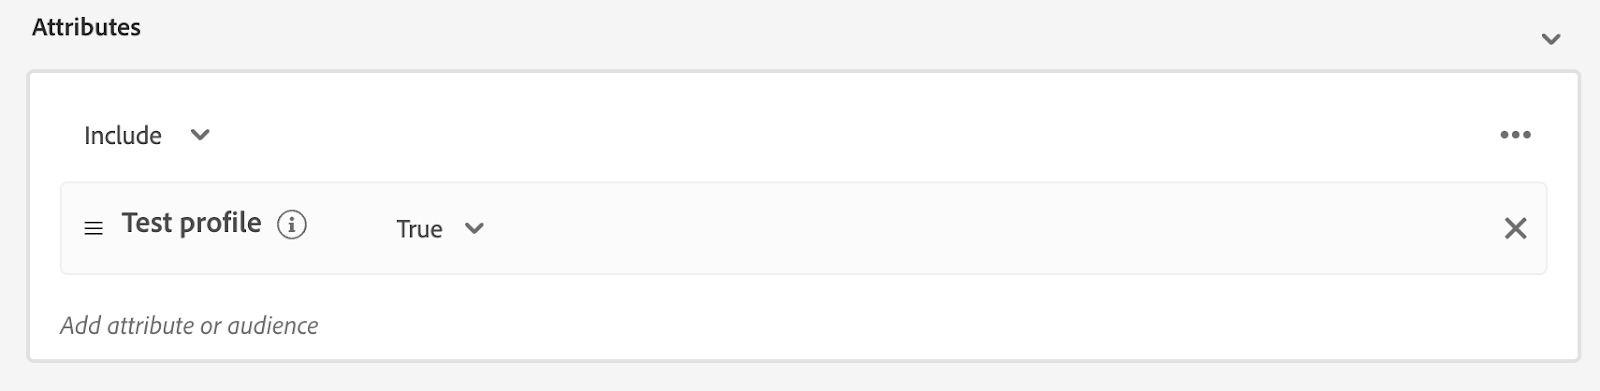
Once your profiles are created, you’ll then want to add any additional attributes needed for testing to those profiles. This will likely require you to know any additional schemas and datasets so be sure to familiarize yourself with your current data setup. Think about what audience qualifications you are testing…
- For example, if a user needs to have signed up for an account within the past 10 days, you’ll need to specify the timestamp or signup date field for those test profiles.
- Maybe your audience is only targeting customers who have made a purchase in the past 6 months; you’ll need to create another csv file to upload into a sample event dataset adding that purchase data into the test profile you created.
You can check to make sure you are seeing your profiles and attributes appear correctly in the Adobe Experience Platform UI by navigating to the Customer > Profiles section on the left ribbon, and searching for the profiles you created by the ID namespace (email, account id, etc). Here you will see the details of your test profile.
You can now create your test audiences. Create the audience as you would for the campaign but with the addition of the test profiles condition.
You can check to be sure your test profiles qualified for your audience/s correctly by going back to the Customer > Profiles section and the Audience Qualification section of the profile.
Congratulations, you now have test profiles to leverage for a safe and secure end-to-end testing process.
Downstream Use
Adobe Journey Optimizer - These test profiles are especially important when running an Adobe Optimizer Journey campaign or journey in test mode, as only profiles with the test profile flag will be allowed in the test.
General Use - Use these test profiles to send to any downstream destination of your choice by exporting the audience into that chosen platform. This allows you to complete end-to-end testing of campaigns or actions in this platform as normal. For example, using your personal email as the email address field in the test profile you create, sending an audience containing your test profile downstream to your ESP, and then launching a test campaign in that ESP to receive the campaign through your email.
The benefits of this marketer-friendly process enable all Adobe Experience Platform users to play an active role in the testing process of technical and marketing campaigns.