Adobe Campaign Standard: Generate Email Proofs Against Complex Data
Update: In March of 2020, Adobe Campaign Standard (ACS) released the 20.2 update which added Profile Substitutions for sending proofs. For most use cases, the Profile Substitutions feature will supersede the information in this blog post. Profile Substitutions is a more cost-effective method for testing deliveries during day-to-day usage. To learn more, please refer to our blog Adobe Campaign Standard’s New Profile Substitution Functionality.
The information contained in this blog will still be useful in cases where you want to perform 100 percent test coverage. This will be most useful when developing your initial deployment on a new ACS instance, or before user data is available to be imported into your instance. These techniques also remain extremely useful for complex datasets which may involve many email variants, to ensure that even the rare variants of a delivery are thoroughly tested.
Adobe Campaign Standard (ACS) is a powerful tool for creating and executing email marketing campaigns. One particularly beneficial feature with Adobe Campaign is the ability to preview personalized emails before sending them, to make sure the correct attributes were selected and properly displayed.
However, when a delivery contains personalization attributes that are not on the profile, but are added through enrichments in the workflow, the out-of-the-box test profile feature cannot be used. Test profiles only work in cases where all personalization attributes exist on the profile.
While not as intuitive, there is a solution for sending proofs that provides coverage for multiple variants of a single template. With a little bit of elbow grease, a bit of planning, and detailed and collaborative spreadsheets — you can make sure everything is working as intended before sending your next email.
Create “Live” Profiles to Spoof User Data
In order to test the combinations of variables in your delivery, our solution requires you to manually generate mock profiles that model the variants of your data. It's important to differentiate these mock profiles from the ACS default feature of test profiles, which are limited in function. In fact, these mock profiles will be included in a workflow audience and their data enriched through the same process as live profiles, therefore they do not require creating a corresponding test profile.
While simple in concept, there is some complexity in the execution of this solution. The level of complexity is dependent on the number of variables that determine content variants. Upfront analysis of the variants and data combinations is required to ensure complete test coverage.
Screenshot of setting up a mock profile with Preferred language of “French - Canada.” Note that the First name has been set to “Testuser_fr_ca” and the Last name to “Tester,” in order to tell this profile apart from your live audience.
Setting Up and Using Manual Profiles
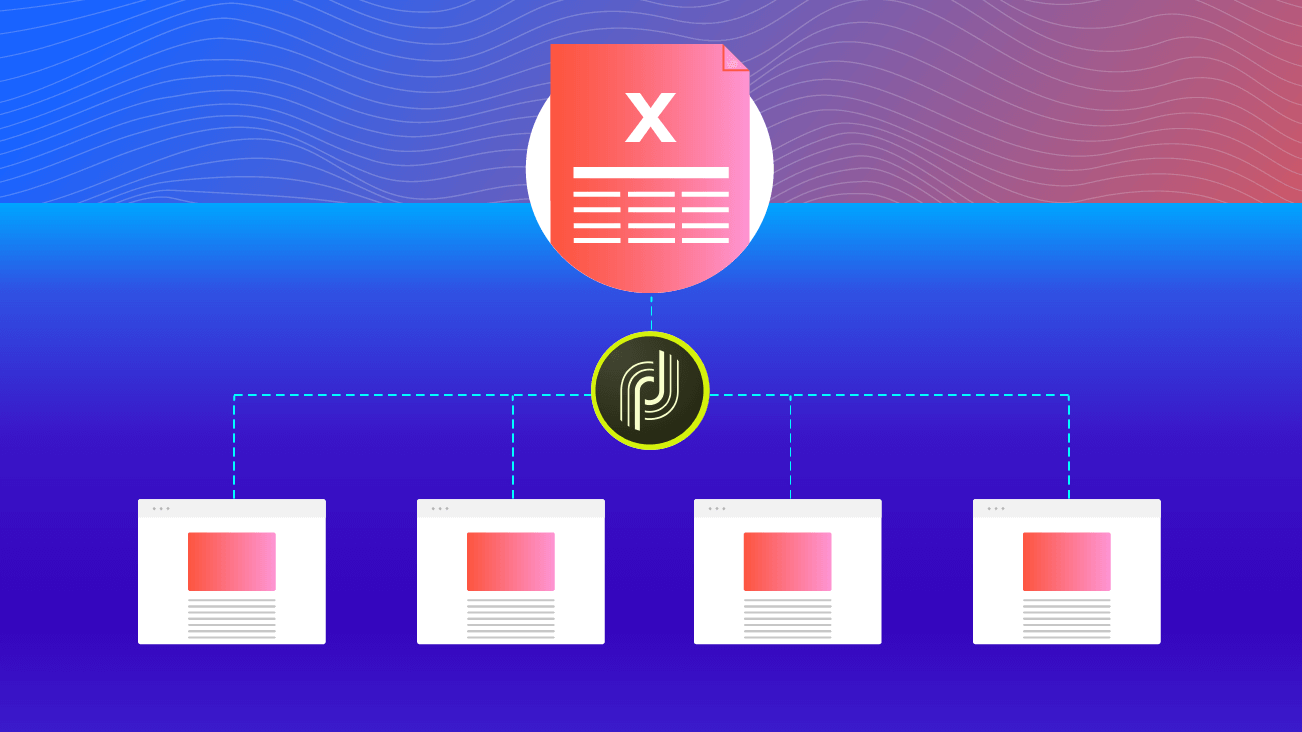
A spreadsheet is a good tool for identifying the variations and maintaining the test profile data. The spreadsheet can be saved out to a CSV file, and then that CSV file can be imported into ACS to create and update the mock profiles.
Screenshot of an example spreadsheet defining mock profiles.
Maintaining this external master sheet will allow you to manage all your test data in one place, allowing multiple people to review and/or modify the data to ensure that all the personalization variables are assigned values to cover the variations that must be tested. Make sure to utilize multiple email accounts, one for each variation that needs to be tested. With separate email accounts, you will know exactly what was tested and can compare the values for each email address in the master spreadsheet against the content in the email.
Ideally, your IT department will create these email accounts on your corporate network. Another option is to use Gmail’s built-in aliasing features to quickly create distinct email addresses that all send to the same main Gmail account. Create a single Gmail address for your testing purposes, then after the local part of the email, add a plus sign (“+”) along with a unique identifier. For example, if your main Gmail address is <<localpart>>@gmail.com, then you can use <<localpart>>+1 @gmail.com, <<localpart>>+2 @gmail.com, <<localpart>>+3 @gmail.com, etc. for the mock profiles in your test cases.
The emails for these accounts will all be delivered to <<localpart>>@gmail.com, but you will be able to determine the specific variation to which that email was sent, and can look up that email address in the master spreadsheet to confirm that the email content matches what you would expect given the data values assigned to that email address.
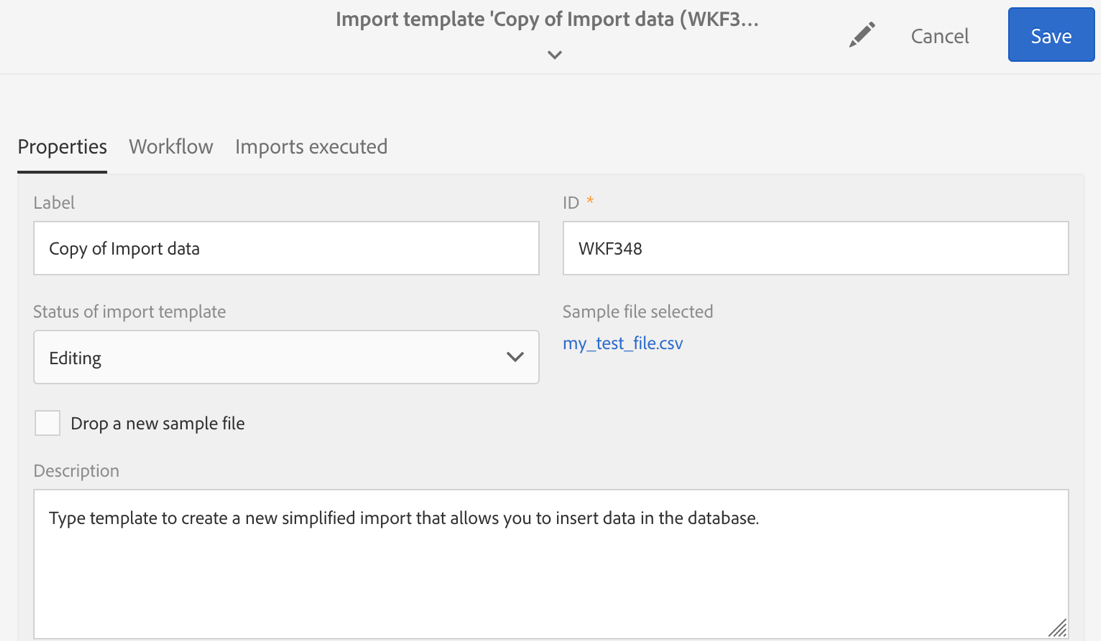
When you’re ready to import your mock profiles into ACS, you’ll need to set up an Import. Click Adobe Campaign > Resources > Templates > Import Templates. Copy the default Import Template, called “Import data.” Drop the CSV version of your Spreadsheet into the file area, and then use the Workflow tab to define custom relations from your data to the data in ACS.
Screenshot of the Import template window.
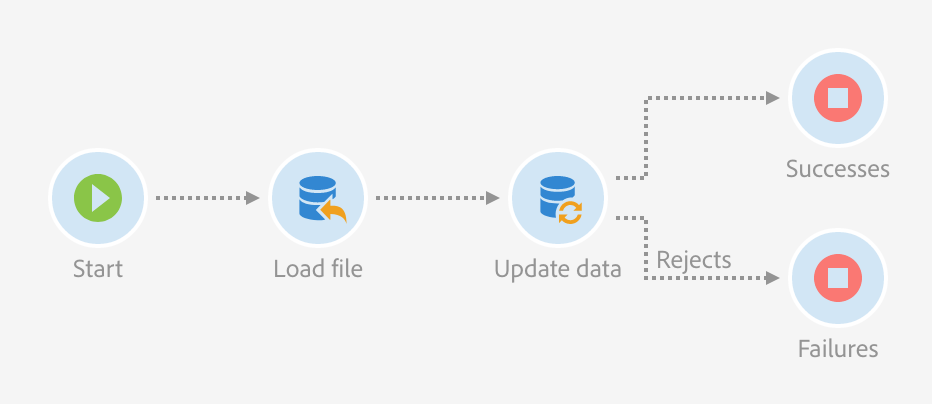
In the simplest case where you are only using the default fields in ACS, you will only need to customize the Load file and Update data activities.
Screenshot of a simple Import template workflow.
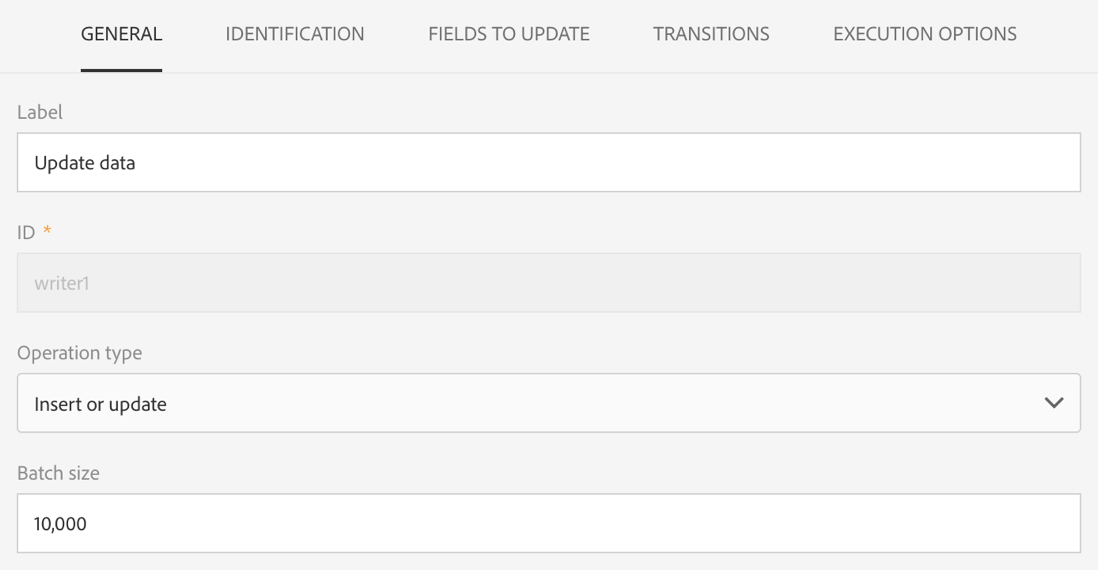
To continue with the simplest case, after you map your fields in the Load file step, you would only need to set up one Reconciliation against profiles during the Update data step. Make sure the Operation is set to “Insert or update,” which will allow you to make later modifications to the spreadsheet and overwrite the profiles you’re using for proofs.
Screenshot of the Update data activity.
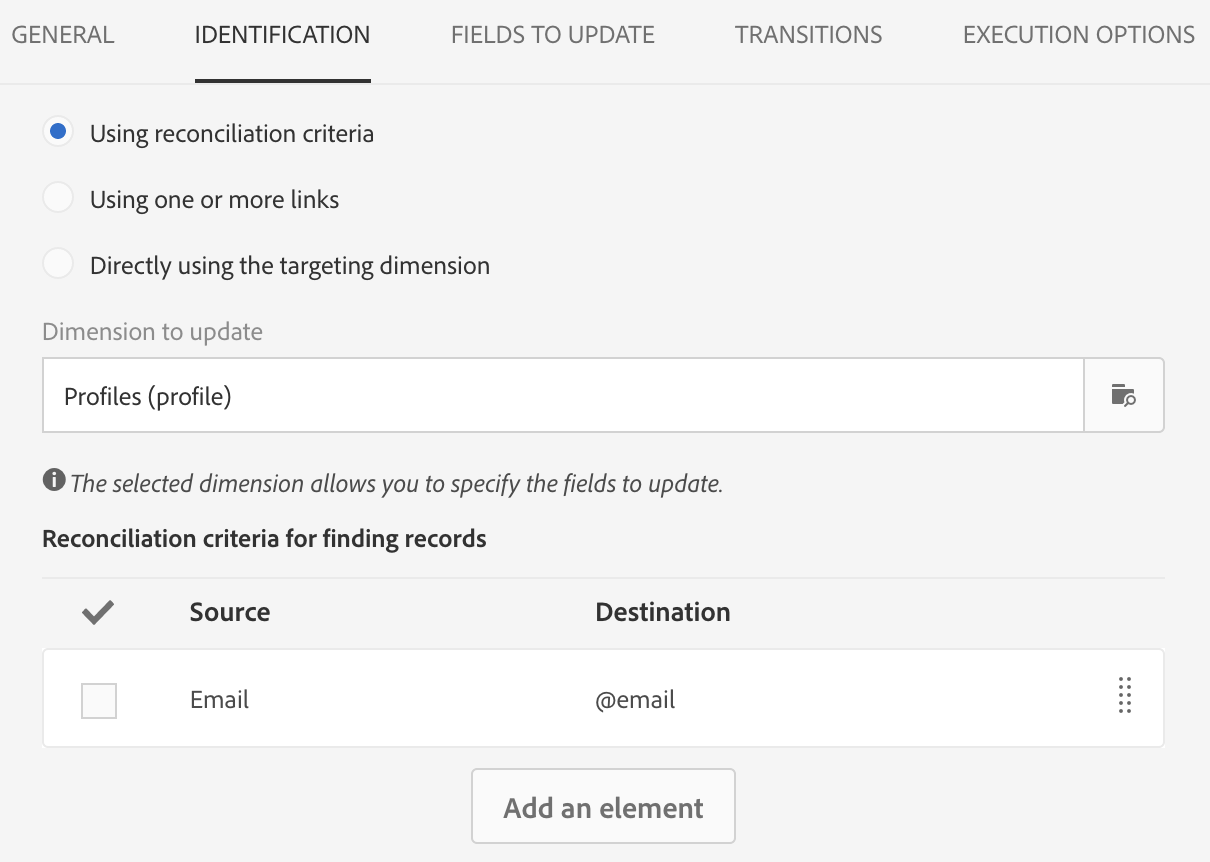
Under Identification, the “Dimension to update” will be Profiles. Select a sensible method for Reconciliation, e.g. unique email addresses (even if you’re using Gmail aliases!).
Screenshot of reconciliation in the Update data activity.
You will also need to ensure you update all relevant fields under the Update data step.
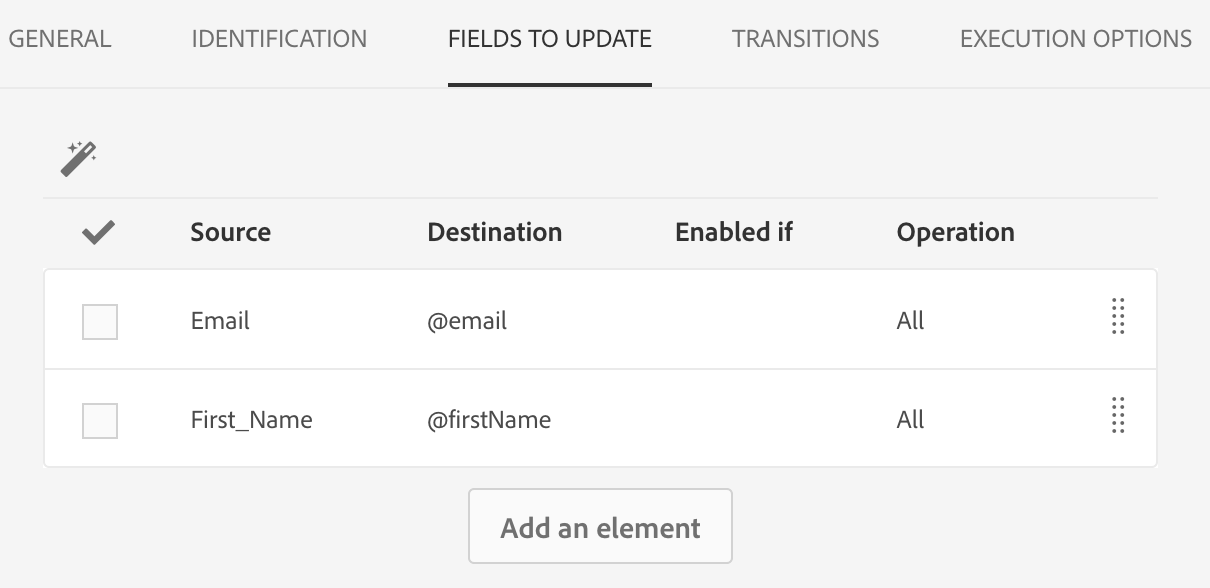
Screenshot of adding fields in the Fields to Update tab of the Update data activity.
If your data model is more complicated, such as if you have several Custom Data Extensions mapping various data sets, you may also need to Reconcile against and Update Data in those data sets, before your import is complete.
When you have finalized your import, make sure to save your work, then use the “Start” button to perform a test of the workflow. When your workflow is finished, go to the Properties tab and set the Status to “Available”— your import workflow is now ready for use. To run the workflow, click Adobe Campaign > Profiles & Audiences > Imports, then press the “Create” button and when prompted to “Select the import type,” choose the template you created for this purpose.
Using Your Mock Profiles
Your mock profiles are created as regular profiles and can be used like any other profile during the setup and testing of an Email delivery. In particular, you can do a dry run of a complex workflow by specifying that you only want to use your mock profiles to perform a send, e.g. in a Query activity or via an Audience. You could also test a one-off Email delivery outside of a workflow by sending the email to only the mock profiles, but we will focus on the more complex case to show you how this works in context.
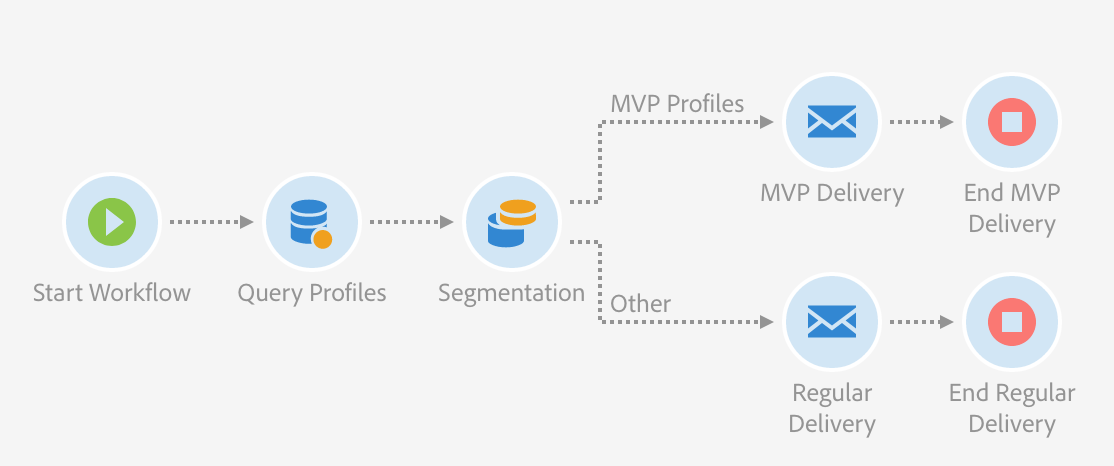
Assume you have set up a workflow that uses one or more Query activities to target an Audience for an Email delivery. Your workflow might look something like this:
Screenshot of a simple email workflow.
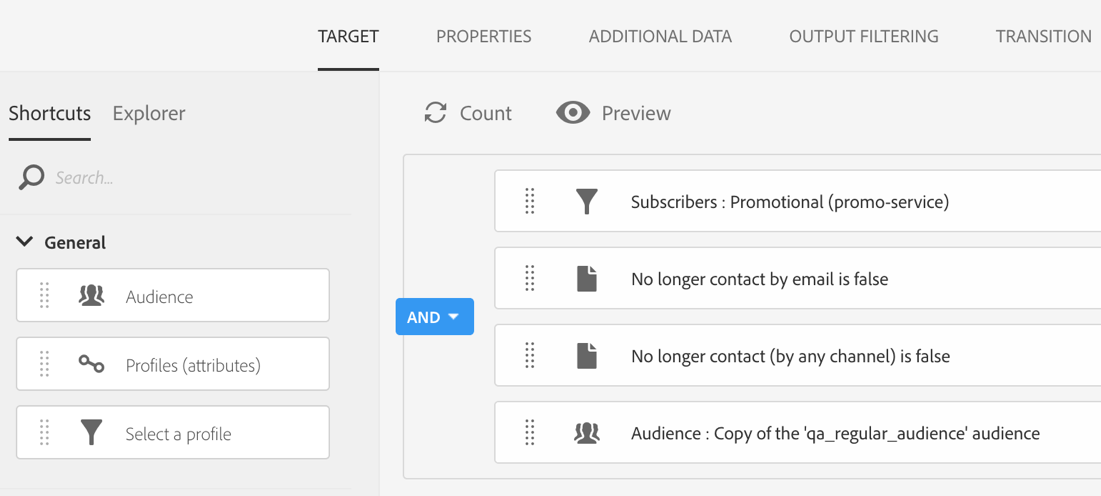
Here we edit the Query Profiles activity. To test our workflow, we want to make sure that only our mock profiles are included in the audience for now.
Screenshot of defining the Target in the Query Profiles activity.
The Audience named “qa_regular_audience” includes targeting criteria containing the mock profiles. An Audience of the mock profiles can be created through the “Audiences” interface under “Profiles & audiences,” or as part of the file Import for the mock profiles. If a specific subset of the mock profiles are desired in a test run, filter for those profiles on this screen. Use the Count and Preview functions to verify that only the mock profiles are included.
Run and test your workflow. Note that you will also be testing operations such as Segmentation during this process, a natural byproduct of spoofing your user data using the mock profiles. Since your target is entirely composed of the mock profiles, send the Email deliveries. Review the emails from those test accounts to confirm that the appropriate content displays for the variants.
Pros of Manually Spoofing User Data
Assuming you can generate a complete set of test profiles and map them all to separate email accounts, you will get accurate renders of all possible variants of your emails. This is an extremely solid way to QA email deliveries which have a limited set of known variants.
Cons of Manually Spoofing User Data
The mock profiles set up for testing will clutter up your data in ACS. Take care to ensure that these addresses are not included when you run reports on your profiles or your Deliveries.
Because the same Email deliveries used for the live audience are also being used for test purposes, take extreme care during QA to ensure that you do not accidentally send a test message out to the live audience. After preparing and before confirming the delivery, review the Sending logs to ensure that the messages will only be sent to your mock profiles.
When it is time to send the Delivery to the live audience, restart and rebuild the workflow. To use the same workflow again, change the Query step(s) to point to the live audience, then delete and recreate all the Email deliveries so that a new send can be performed. Because the deliveries and audience query must be updated, this method is not a true test of the live delivery, but it provides a useful way of generating proofs when complex data sets are used in personalization.
Capturing all the possible variants of user data may be exceedingly complex. To mitigate complexity, you can narrow down your test cases; however, doing so will create a gap in test coverage.
If you ever want to add new fields to the master spreadsheet, your import template will need to be updated, and a developer may be needed to make that update.
Additional Tips and Tricks
We strongly recommend the use of Delivery Templates when utilizing this mock profile process. Because the Deliveries must be recreated when sending to the live audience, any modifications – including bug fixes – may be lost. This method, therefore, works best when the Delivery templates require little or no change between Deliveries. Make sure any updates are made directly to the Delivery template, so that the same template can be used during both the QA process and the live send.
Fully Test Your Email Deliveries
Although the use of these mock profile requires increased effort, we have found it to be the best way to fully test our Email deliveries in ACS when complex data sets are involved.


