Creating an AWS RDS MySQL Database with MySQL WorkBench

In this article, we will accomplish this through the following steps:
- Install the MySQL WorkBench database client
- Create an RDS MySQL instance in your AWS environment
- Use the MySQL WorkBenchclient to create a table, insert a row and query from it
With Amazon RDS Free Tier, AWS makes it possible for you to create relational database without much expense. This is an option who need to fulfill the use case of a relational database.
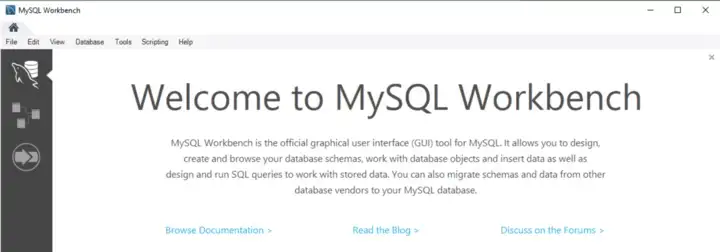
Install MySQL WorkBench
Go to https://www.mysql.com/products/workbench/ and install on your computer.
MySQL RDS Creation
For this demo, you will be required to have an AWS Account setup. You can follow the instructions located at Getting started with AWS, Java 11 (Amazon Corretto), Eclipse and AWS Toolkit or verify your own setup(disregard the Eclipse and Java if you are not using Java.
Once you have logged into your AWS Console you can go to the RDS Dashboard and press “Create Database”
Select Standard create, MySQL and Free Tier to start
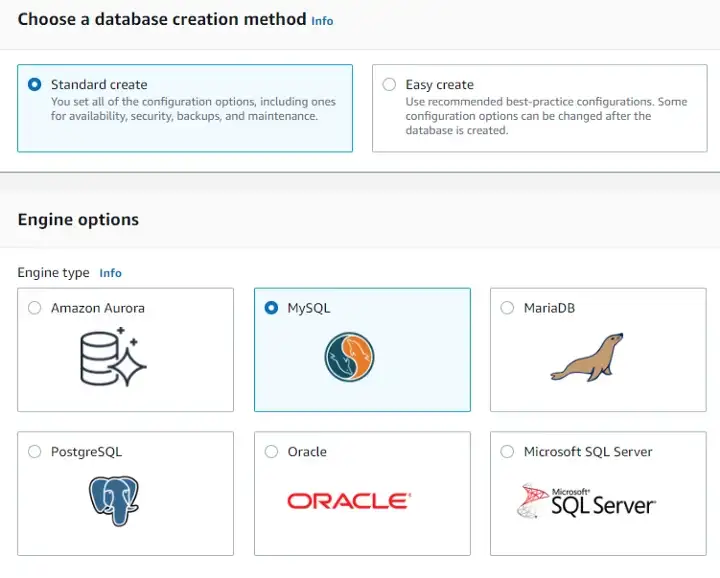
Configure the Master username and master password as you wish, for this demonstration I will use a master username of “myusername” and a master password as “mypassword”
Set the Public access value as Yes(This so that we can access the database from our MySQL WorkBench client and Lambdas for the subsequent article at the end). Further security can be done by limiting access to certain IPs and configuring specific access for Lambdas to the RDS VPC but not in scope for this article.

Press Create Database (It takes about 15 minutes to create)

Navigate to the dashboard of your RDS instance and click on the default security group.
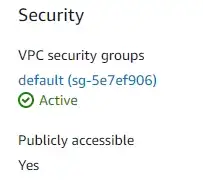
- Click the Security group id

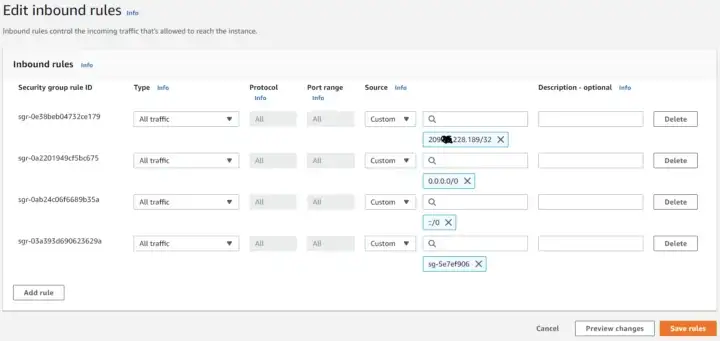
- Click into the default security group and press “Edit inbound rules” and ensure that all traffic external traffic for IPv4, IPv6 and IPv4 (Your IP)

Testing the RDS instance with MySQL WorkBench
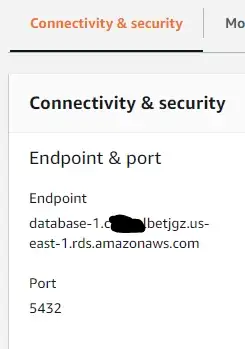
- Get the RDS endpoint information from the AWS Console and note the username and password created above.
- Open MySQL WorkBench, press Database -> Connect to Database . Enter the RDS endpoint in the hostname and enter in the username and password(Store in Vault …)
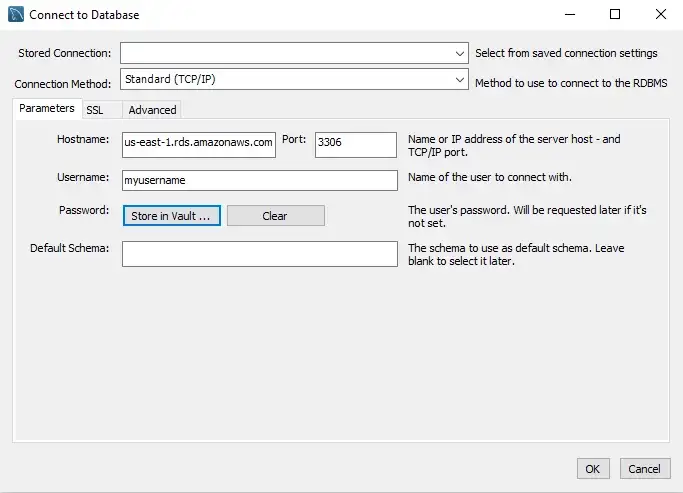
Possibly troubleshoot with the following link https://aws.amazon.com/premiumsupport/knowledge-center/rds-cannot-connect/
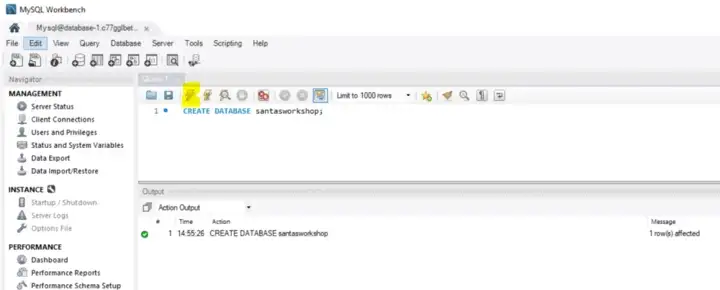
Let’s now create a database called santasworkshop typing the command into the Query Tool and pressing the execute button (Lightning bolt)
CREATE DATABASE santasworkshop;
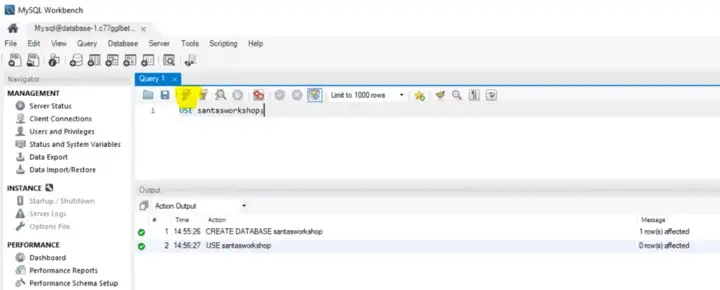
We should then select the newly created database by executing the “USE santasworkshop;” command
Now that we have the Query Tool open we can create our first table by executing the following script in the Query Tool
CREATE TABLE LETTERHISTORY
(
ID INT NOT NULL AUTO_INCREMENT PRIMARY KEY,
LETTERID VARCHAR(50),
LETTERHISTORYJSON VARCHAR(600),
CREATED DATETIME
);
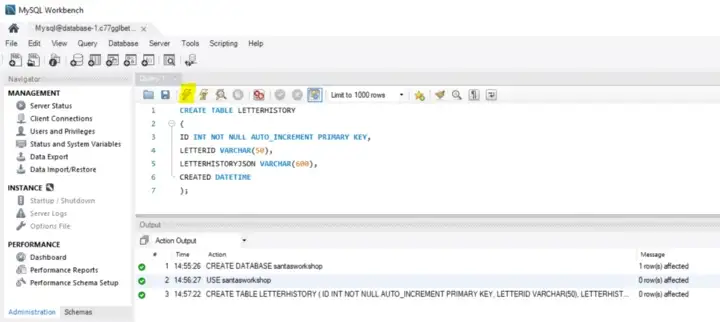
We should be able to insert records by executing the following command in the Query Tool
INSERT INTO LETTERHISTORY (LETTERID, LETTERHISTORYJSON, CREATED) VALUES ('LETTER#4854', '{}', NOW());
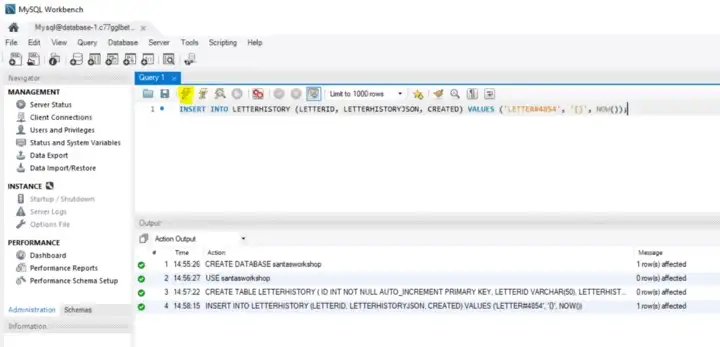
We should be able to query records by executing the following command in the Query Tool
SELECT * FROM LETTERHISTORY
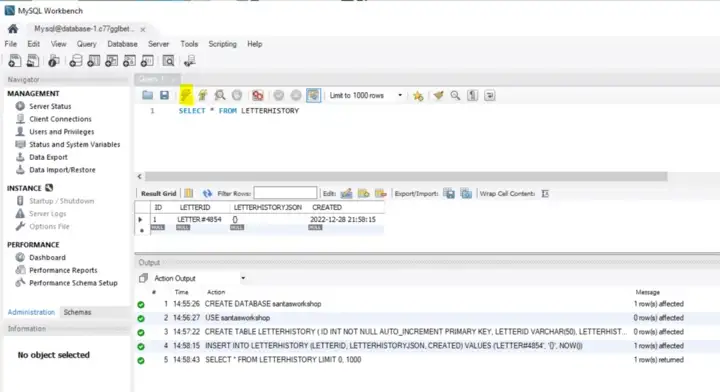
Resource cleanup:
Please delete your RDS instance to stop any additional costs to your AWS Account if you don’t require it any further.
If you would like to create an AWS Java Lambda that connects to this database to make queries and updates, please proceed to AWS Java Lambda accessing an AWS RDS MySQL Instance with CDK.


